TIMELINE
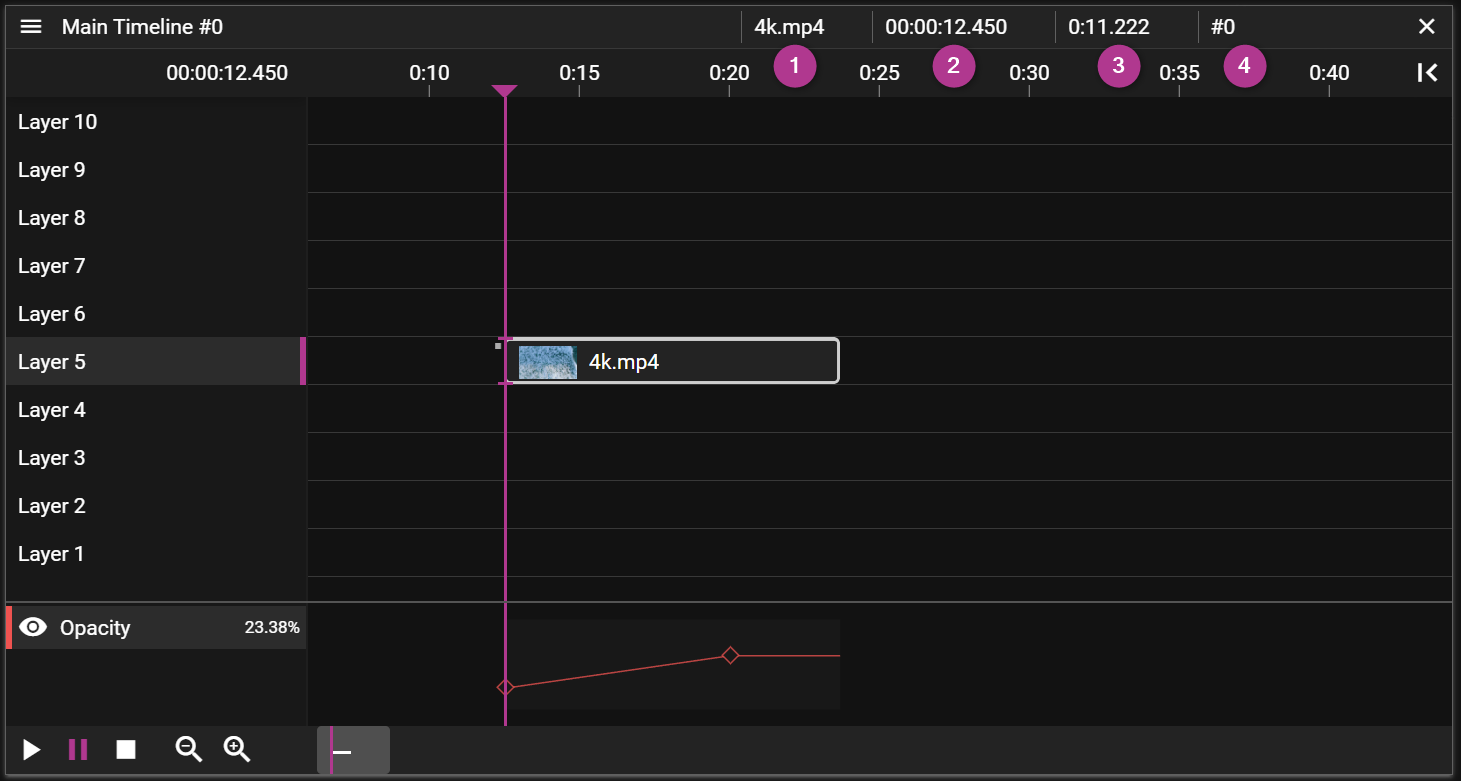
A Timeline is where you place the content that you want to play to your audience. The content, like videos or audio, is defined in assets and by dragging an asset to a Layer on the Timeline you create cue. By selecting a cue on the timeline you can further edit how the referred asset is used in the show. For instance, you may want to change the duration of a video clip or you may want to add an Effect.
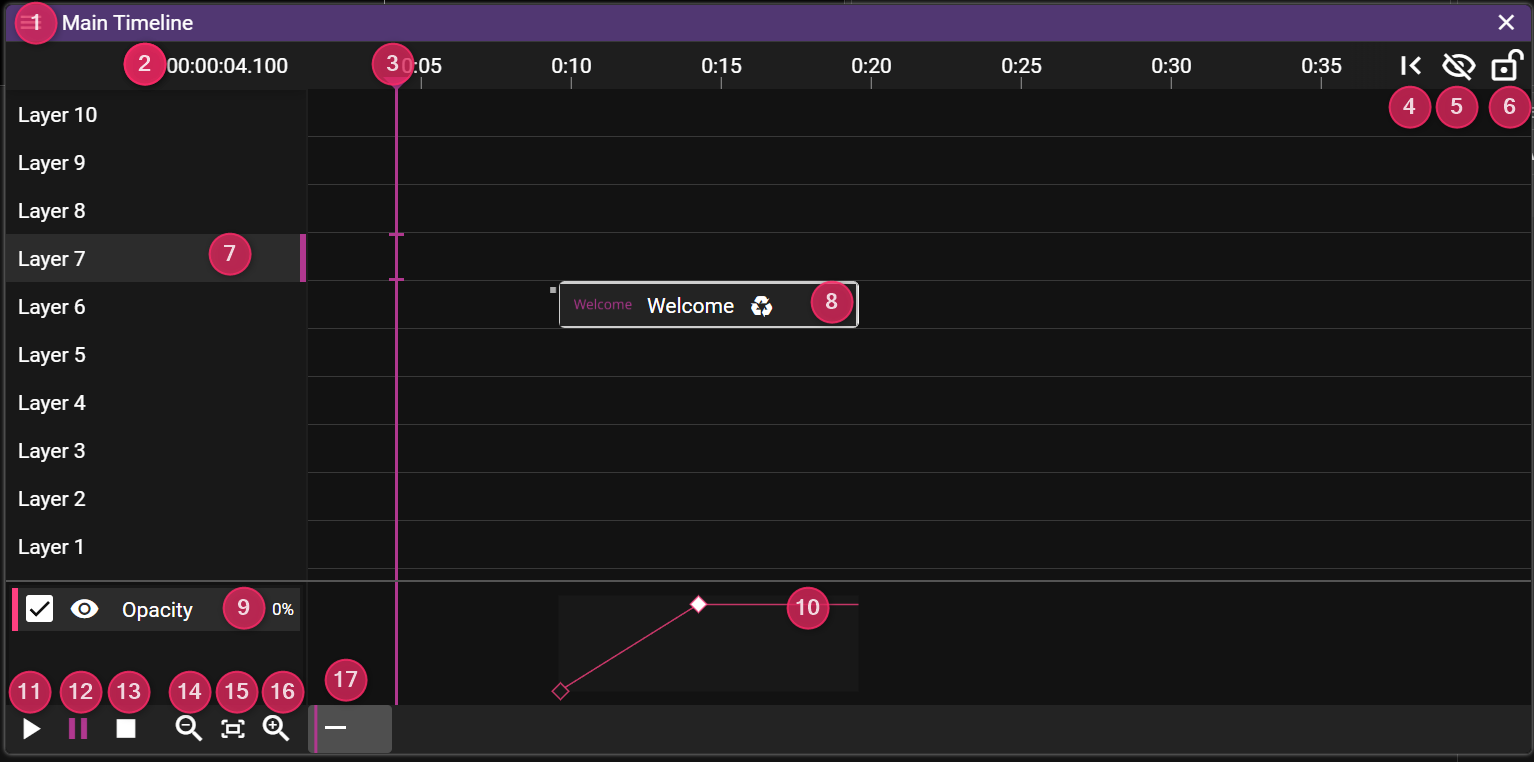
- Name shows the name of the Timeline.
- Timeline Time shows where the Time Position Indicator is located.
- Edit this to jump to a specific time.
- Time Position Indicator shows the current time position using a vertical line drawn through the Timeline window. The color of the line indicates the Click Jumps to Time state.
- Jump button to jump to last start position on the Timeline.
- Blind Edit button can be used to enter blind edit mode for the timeline.
- LOCK STATE Can be open, locked for edit, or hands off (you cannot move the play marker)
- Active Layer shows a pink vertical bar to convey that this layer is active.
- Cue object that can be selected to edit show content.
- Effects shows the chosen effects for the selected cue.
- Use the eye to hide/show a specific effect curve.
- Tween Curve allows you to create and edit tween points.
- Play button to start playback.
- Pause button to pause playback.
- Stop button to stop playback.
- Zoom Out button to zoom out the Timeline view.
- Zoom To Fit Zoom in to fit timeline, or selected cues (Ctrl-0)
- Zoom In button to zoom in the Timeline view.
- Horizontal Scrollbar to scroll to a specific time in the Timeline view.
Tip 1 To change timeline time (3) using keyboard, press t.
Tip 2: A nice feature is the Insert/Delete Time function (Ctrl+Shift+T). This allows you to add or remove time at the play marker position. It includes options to exclude updating cues or tween points. This feature is a lifesaver when directors demand "just five more seconds here" or "trim that boring part!"
Tip 3: Use Ctrl+0 to zoom to fit. If cues are selected, it zooms to fit the selection. Otherwise, it zooms to fit the entire timeline.
TIMELINE CONTEXT MENU
There are two context menus in the Timeline window, one for editing the timeline itself and one for working with cues.
TIMELINE GENERAL CONTEXT MENU
If you right-click in the Timeline window, without having any cue selected, you will open the general context menu.
You can also open this menu by clicking on the three horizontal lines in the top left corner of the Timeline window.
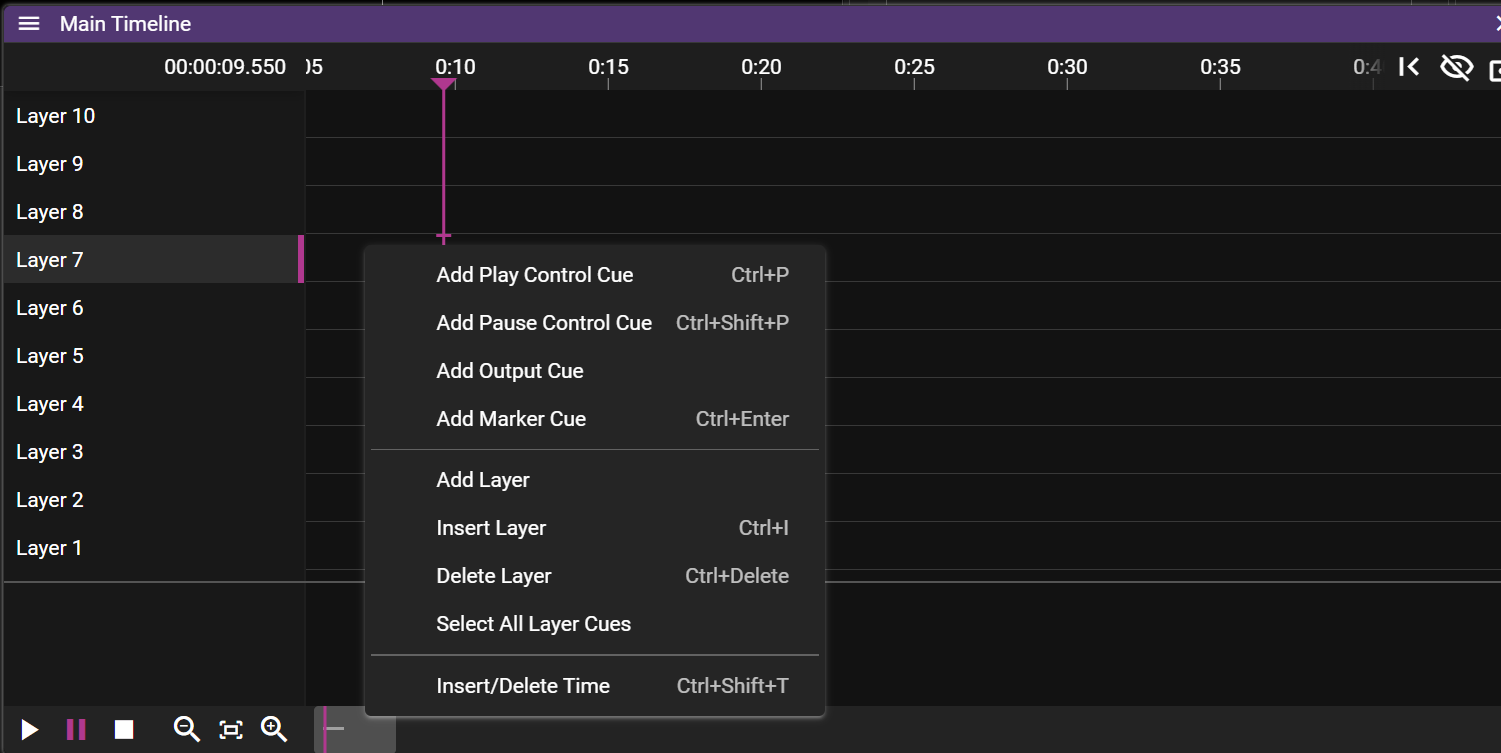
- Cue operations:
- Add Play Control Cue adds a play control cue.
- Add Pause Control Cue adds a pause control cue.
- Add Output Cue adds an output control cue.
- Add Marker Cue adds a marker cue.
- Layer operations:
- Insert Layer inserts a layer above the active layer.
- Add Layer adds an additional layer at the top of the Timeline.
- Delete Layer deletes an additional layer at the top of the Timeline.
- Select All Layer Cues selects all cues on the active layer.
- Insert/delete time Adds or remove time from the timeline
TIMELINE CUE CONTEXT MENU
If you right-click in the Timeline window, while having one or multiple cues selected, you will open the cue context menu.
You can also open this menu by clicking on the three horizontal lines in the top left corner of the Timeline window. Again, at least one cue needs to be selected for this menu to be shown.
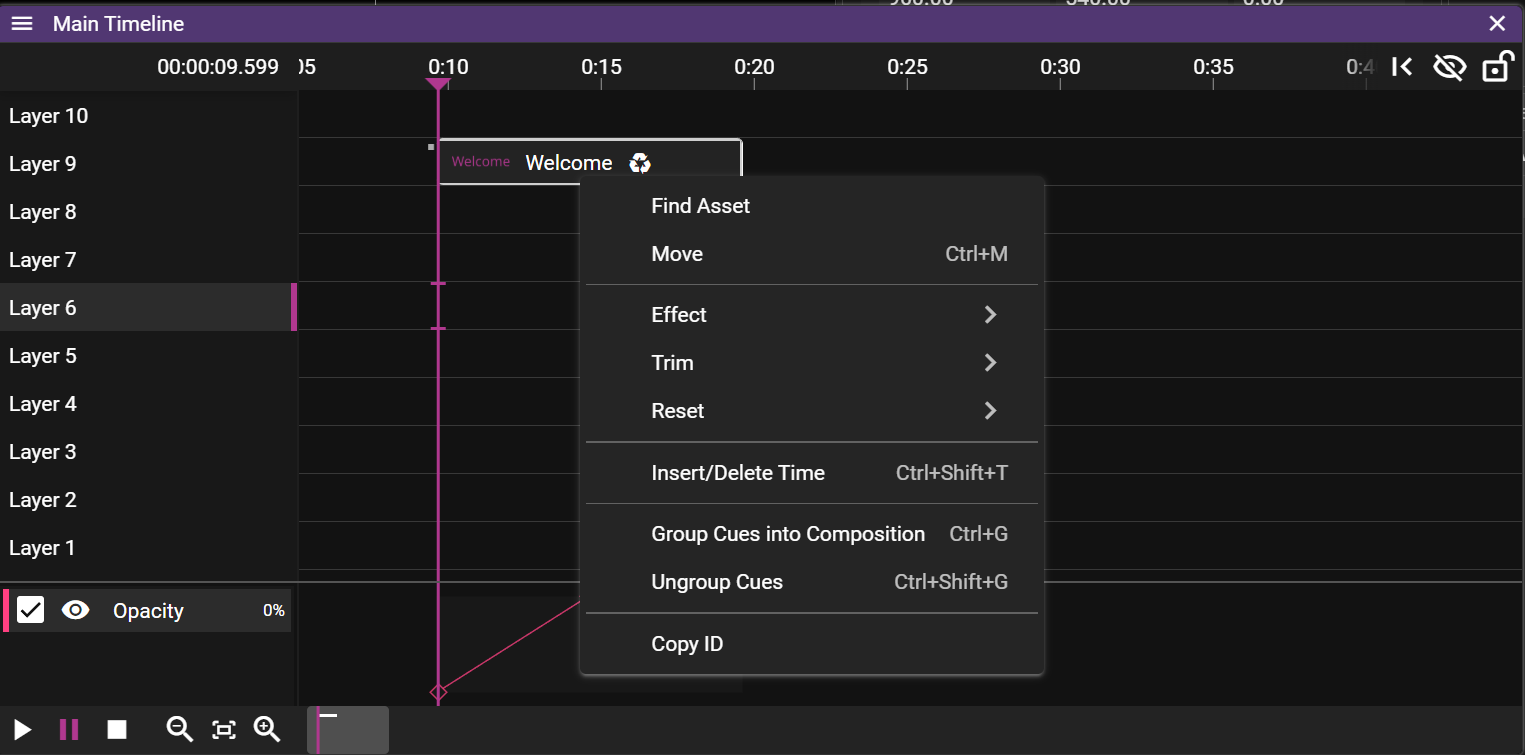
- Find Asset tries to find the asset(s) associated with the selected cue(s).
- The asset(s) found will be selected in the Asset Manager window.
- Move opens a dialog that allows you to move the selected cue(s).
- Effect opens a sub menu allowing you to add or remove effects to the selected cue(s). See Effects for details.
- Trim allows you to shorten the duration of the selected cue(s) based on where the Time Position Indicator is located.
- Start edit the start time of the cue.
- End edit the end time of the cue.
- Reset allows you to reset some settings.
- In-Time.
- Duration resets the duration of the selected cue(s) to the original duration.
- Group cues into composition creates a composition.
- Ungroup cues removes the composition.
- Copy ID copies the timeline/cue IDs. Handy for use with the external protocol.
LAYERS
A Timeline consists of multiple layers on which cues can be added. When the show is empty you can think of the layers in the Timeline as a stack of fully transparent papers. As you add image or video cues to the layers you will fill these transparent "papers" with pixels. The layer with the highest number represents the top of the "paper" stack which means that cues placed on this layer will render on top of cues placed on layers below it. You may override this behaviour by changing the Stacking on the cue.
Layers further up the layer stack may occlude cues further down:
If a cue is selected on the timeline it will be prioritized for movement operations in the Stage window:
KEYING LAYER
From the Layer Properties, which you access by clicking on a layer name in a Timeline, you can turn the layer into a keying layer which means that all cues that are present on that layer are used to produce a key. You can think of the key as a filter which is used to mark areas which you want to fill with specific content. For instance, you may place a circular shaped image on a keying layer and have that circle being filled with contents from cues residing on regular layers.
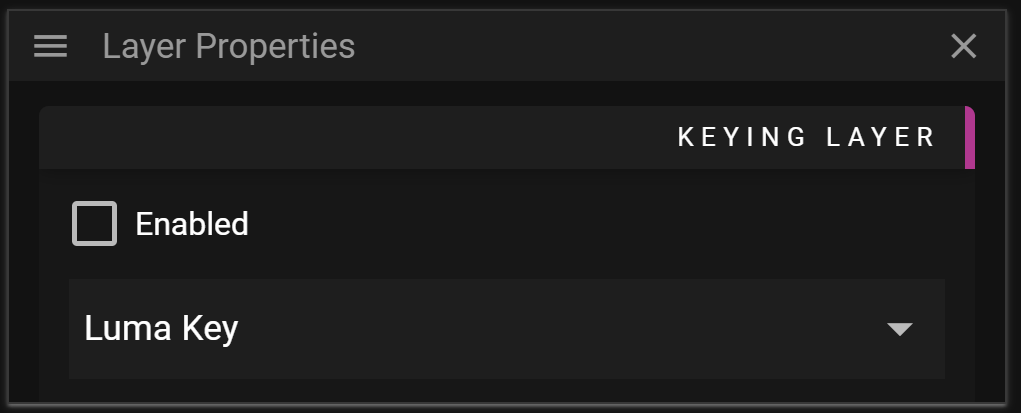
WATCHOUT provides four different types of keying layers. Each type uses a specific pixel property to define how the keying filter is created. Note that the keying layer type only affects the cues residing on the keying layer and tells the system how these cues are interpreted to create the keying filter. The following keying filter types are available:
- Luma Key means that the luma value of each pixel is used to define the filter.
- Luma Key (Inverted) means that the inverted luma value of each pixel is used to define the filter.
- Alpha Key means that the alpha value of each pixel is used to define the filter.
- Alpha Key (Inverted) means that the inverted alpha value of each pixel is used to define the filter.
If you define multiple keying layers, even on different timelines, all the cues on these layers are combined into a single keying filter. Each cue will contribute to the keying layer according to the keying layer type active on the layer on which they reside.
The layer order of the keying layers does not matter, you are free to place the keying layers where it is most convenient to you.
As outlined above you may use keying layers to define how you mark pixel areas based on their properties, but once you have created these pixel areas you want to define what content you should fill those pixels with. You may read more about how this is done in the Key & Fill section found in the Cue Properties.
You can read more about this effect here.
CUE HOVER INFO
When you hover over a cue some helpful information will be shown in the top of the Timeline:
- The name of the media applied to the cue.
- The Timeline time when the cue starts.
- The duration of the cue.
- The cue ID.
CUE OVERLAPS
When two cues reside on the same layer they may overlap. This is usually an unwanted state so when an overlap has been detected the affected cue objects, in the Timeline, are marked with a striped pattern. This can be resolved by selecting and moving cues until the pattern disappears.
Not all cue overlaps are forbidden. Media cues may have overlapping cues of the following types:
There is also another exception where cue overlaps are allowed and that is when you are using Fade-in/out as shown in the video below:
DISABLED CUES
Cues can be disabled to temporarily exclude them from playback without deleting them. Disabled cues are shown with a grey striped overlay and reduced opacity, making them easy to identify on the timeline.
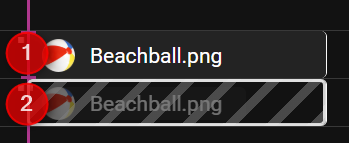
- Normal cue
- Disabled cue
To disable a cue, set its condition to Disabled in Cue Properties.
TIME POSITION INDICATOR
The Timeline Position Indicator shows the current time position using a vertical line drawn through the Timeline window. Its color indicates if the Click Jumps to Time is active. If it is active it means that when a cue is selected the Timeline Position Indicator will jump to the start of the cue.
The Timeline Position Indicator is drawn as a solid pink line if Click Jumps to Time is active, otherwise it will be drawn as a dashed purple line.
CUE TRIM
This feature allows you to change the duration and starting/end frame of the referred asset based on where the Time Position Indicator is located. You can think of it as cutting out parts of the start or the end of a video or audio clip. When you trim a cue using Start the In-time property is changed.
BLIND EDIT
Blind edit mode lets you make changes to a Timeline without instantly reflecting them on the runners.
Click the slashed eye button in the top right corner of the Timeline window to enter blind edit mode. A copy of the Timeline appears with a green frame, also shown in the Stage window. While editing, the Stage only shows your blind edit changes—the original show continues playing on the runners in the background. When ready, click the check button to apply your changes. A confirmation dialog appears before the changes are propagated to the runners.
The link button moves the Time Position Indicator to the current time of the original Timeline.
NOTE: Control cues do not work in blind edit mode to prevent affecting other timelines.