CUE PROPERTIES
In this chapter you will learn about the available Cue Properties.
GENERAL
The General section allows you to edit common data such as Start Time and Duration.
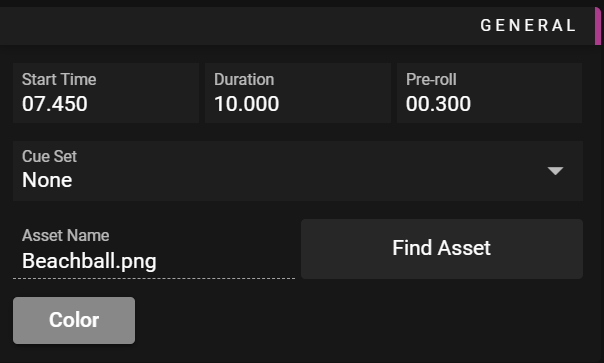
- Start Time defines when the cue starts playing.
- Color defines the color used for the cue on the Timeline.
- The main purpose is to make it easier to organize the cues used in your show.
- Lock can be activated to disable the possibility to edit a cue.
- Media cue-specific settings:
- Duration defines how long the cue will play.
- Pre-roll defines how far ahead of the cue's Start Time the referred media asset will be prepared by the media server (loaded from the disk etc).
- Cue Set defines what cue set the cue is part of
- Find Asset lets you local the asset in asset window
- Control and marker cue-specific settings:
- Name is a user-defined name for the cue. This can be useful when defining jumps in time.
PLACEMENT
The Placement section allows you to edit data related to the location of the cue in the Stage window.
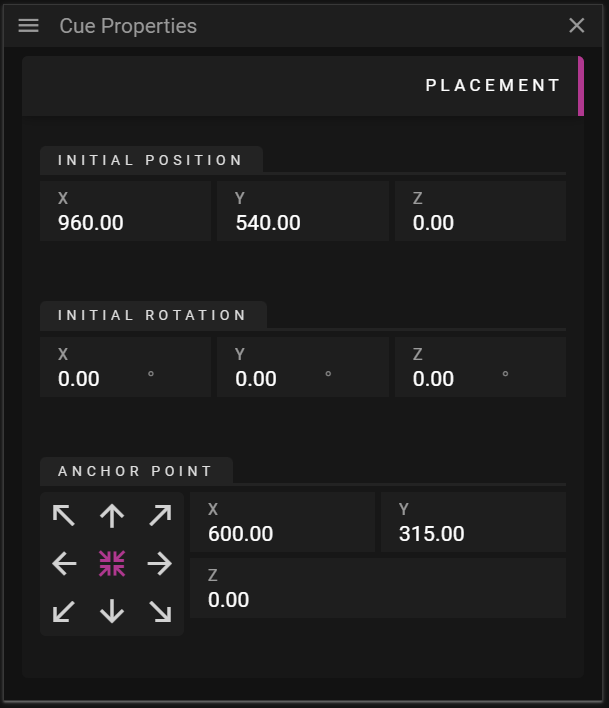
- Initial Position defines the position of the cue without any effects applied to it.
- Initial Rotation defines the rotation of the cue without any effects applied to it.
- Anchor Point defines a cue local point that does not move when scaling and rotating the cue.
- The anchor widget, with arrows, can be used to move the anchor point to the corners, edges or the center of the cue.
MEDIA PLAYBACK
The Media Playback section allows you to edit data related to looping and time offset for the referred asset.
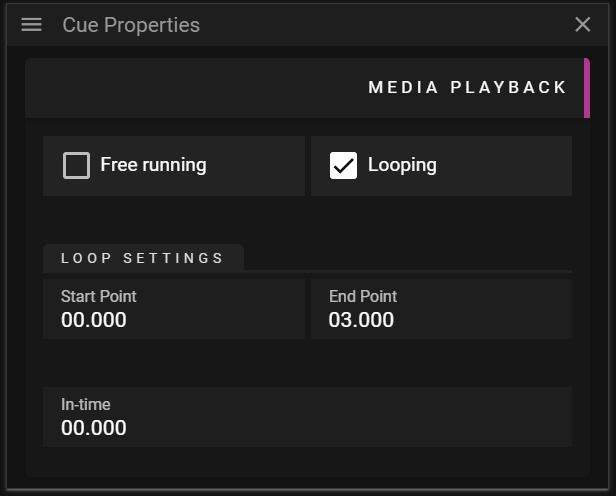
- Free Running activates the play state of the cue regardless of the Timeline play state.
- Looping activates looping of the referred asset.
- Start Point defines when looping will start in the referred asset.
- End Point defines when looping will end in the referred asset
- In-time defines the offset before the cue starts playing the asset in question.
- For instance, if you want to skip playing the first second of a video you can set this to one second.
Free running and looping changes the appearance of the cue:
- Free Running
- Looping
FADE IN/OUT
The Fade-in/out section allows you to edit how the referred asset gradually becomes visible (fade-in), from when the play state reaches the cue, and how it gradually becomes invisible (fade-out) until the play state reaches the end of the cue.
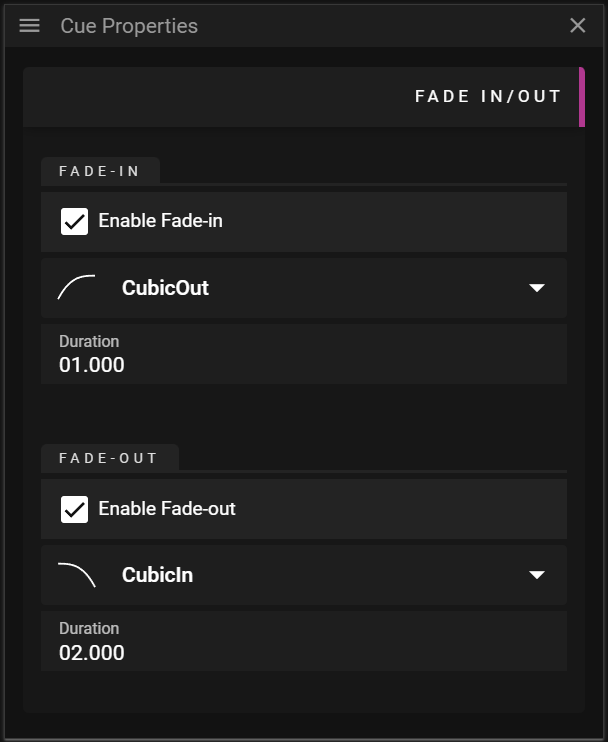
- Enable Fade-in adds a fade-in effect
- Enable Fade-out adds a fade-out effect
- Curve defines what curve to use for the effect.
- Duration defines the duration of the effect.
PRESENTATION
The Presentation section allows you to edit data related to rendering of the asset.
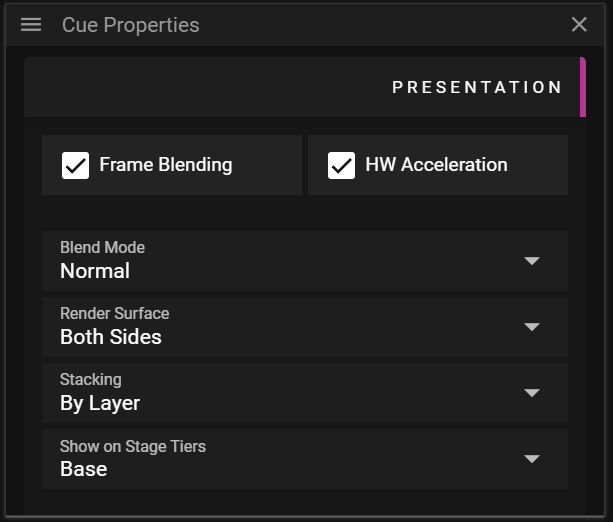
- Frame Blending activates smooth transitions between media frames.
- Note that it consumes more memory.
- HW Acceleration is used for decoding specific codecs, like HEVC.
- Depending on your system and scenario it may be more efficient to keep this deactivated.
- Blend Mode defines how cues using transparency are blended against what has already been rendered.
- Available options are Add, Multiply, Screen, Lighten, Darken and Linear Burn.
- Render Surface defines which parts of cue surface to render: Inside, Outside or Both Sides.
- This can be useful when handling 3D models that have inconsistencies related to the front and back side of its polygons.
- Stacking defines the order in which cues on the Timeline are rendered.
- By Layer means that the layer number defines the render order.
- Layer N is rendered before layer N + 1.
- By Z means that the cue surface depth, the distance to the camera, defines the render order.
- By Layer means that the layer number defines the render order.
- Show on Stage Tiers defines the tiers in which the cue will be rendered.
- A display may decide to only render cues belonging to a specific tier.
ASSET
The Asset section allows you to edit data related to the asset.
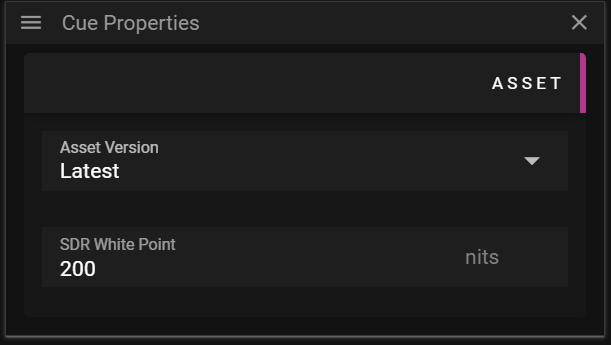
- SDR White Point defines the standard-dynamic-range white point in nits.
CHROMA KEY
The Chroma Key section allows you to enable chroma keying for a specific cue. Chroma is the degree of strength in a color.
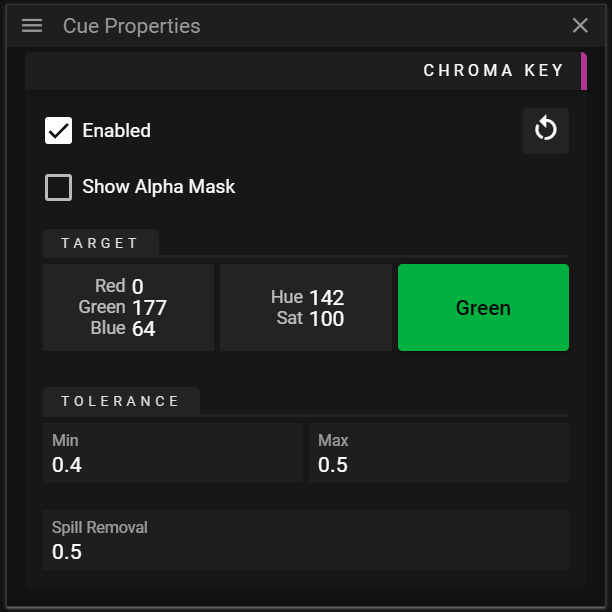
- Enabled toggles chroma keying on or off.
- Show Alpha Mask can be enabled to show which pixels that will be kept and pixels that will be dropped (filtered out).
- White pixels are kept (opaque).
- Black pixels are dropped (fully transparent).
- Red pixels are affected by the Spill Removal solution. You can read more about that below.
- Target defines the chroma that will be filtered out (hidden).
- Red channel.
- Green channel.
- Blue channel.
- Hue of the target chroma.
- Saturation of the target chroma.
- Color opens a color widget allowing you to define the target chroma.
- Tolerance defines how to handle chroma values that are close to the Target chroma in YUV-space.
- Min defines how far from the target chroma, in YUV-space, chroma values are considered to be fully transparent (completely hidden).
- The value defines the black circle, in YUV-space, shown in the image below.
- Chromas that are inside this circle will be fully transparent (hidden).
- This value should be below the Max value.
- The value defines the black circle, in YUV-space, shown in the image below.
- Max defines how far from the target chroma, in YUV-space, chroma values are considered to be fully opaque (not hidden at all).
- The value defines the white circle, in YUV-space, shown in the image below.
- Chromas that are between the black and white circle gradually change between fully transparent (at the border of the black circle) to opaque (at the border of the white circle).
- This value should be above the Min value.
- The value defines the white circle, in YUV-space, shown in the image below.
- Spill Removal is used to reduce chroma keying artifacts around the border between kept and dropped pixels.
- The value defines the red circle, in YUV-space, shown in the image below.
- Chroma values that are between the white and red circle, values inside the "spill ring", will be desaturated to reduce artifacts in this chroma range.
- The thickness of the "spill ring" is given by min (Max - Min, 0.1) * Spill Removal.
- At the border of the white circle the saturation is given by 1.0 - Spill Removal.
- At the border of the red circle the saturation is 1.0.
- The saturation between the white and the red circle is interpolated between the values outlined above.
- Even though the intention is to only affect pixels around the border it is important to understand that the solution is not border-aware and will thus affect all pixels that are within a specific chroma range.
- Min defines how far from the target chroma, in YUV-space, chroma values are considered to be fully transparent (completely hidden).
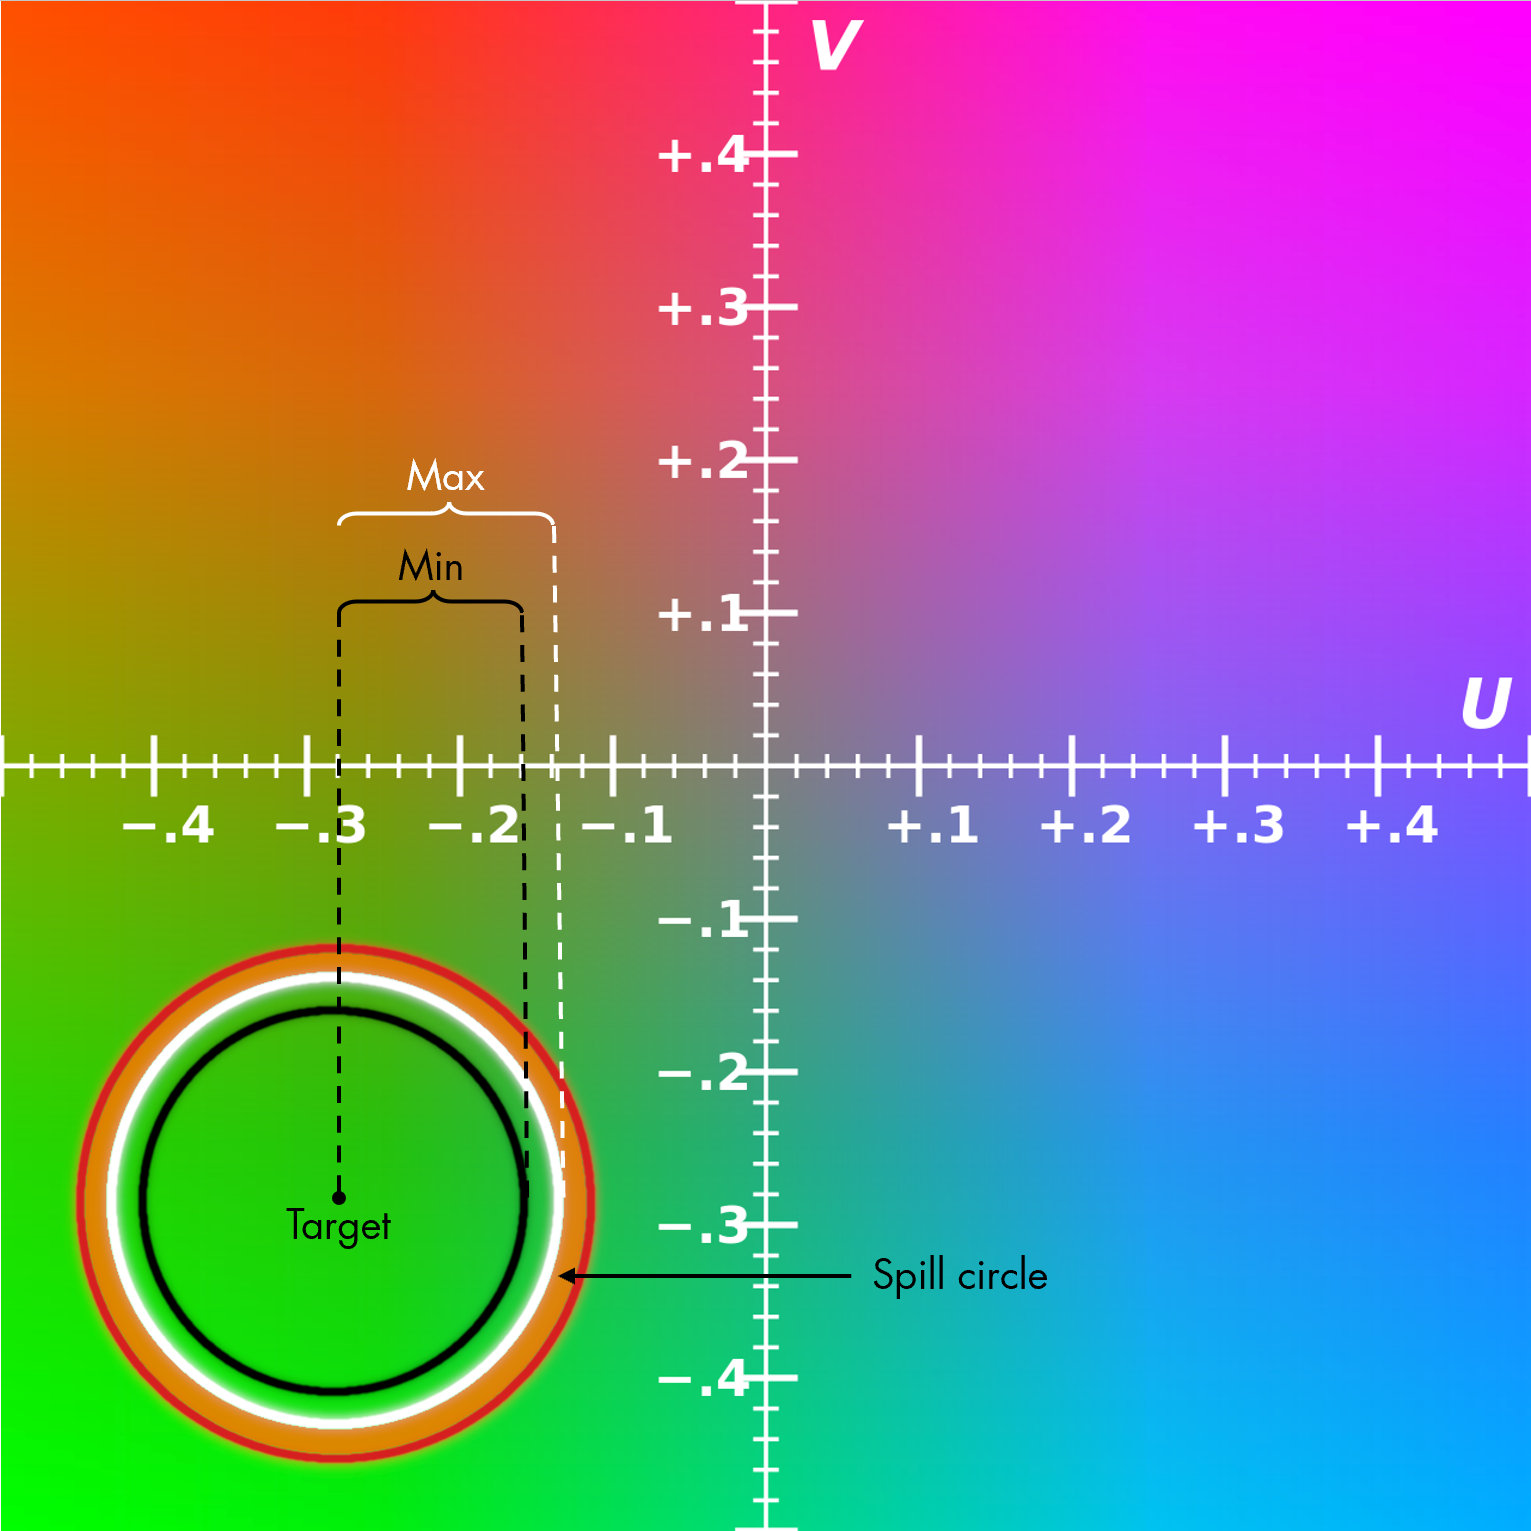
Example U-V color plane with Y = 0.5. Representation within sRGB color gamut (modified)
You can read more about this effect here.
KEY & FILL
The Key & Fill section allows you to make use of keying layers which you can read more about here.
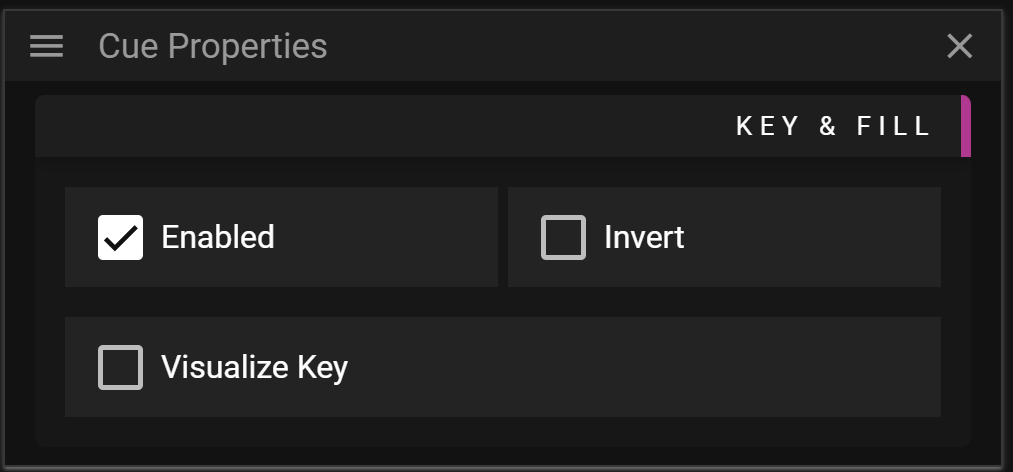
- Enabled toggles the key and fill feature on or off for this specific cue.
- If turned on it means that the pixels of this cue will be used to fill whatever pixels that all keying layers have filtered/marked.
- Invert can be activated to fill the inverted area filtered/marked by all keying layers.
- Visualize Key toggles visualization of the key on and off.
- Can be useful to understand what the key looks like for complex scenarios.
You can read more about this effect here.
MARKER
The Marker section allows you to edit data related to marker cues.

- Description contains an optional user-defined text.
- Count Down activates a countdown label on the Timeline cue object.
- Count Up activates a countup label on the Timeline cue object.
- Duration is used to control the time period in which the countdown/countup label is visible.
OUTPUT
The Output section allows you to edit data related to string output cues. A string output lets you send arbitrary data to a device on the network. The data is sent when the Timeline time reaches the cue Start Time.
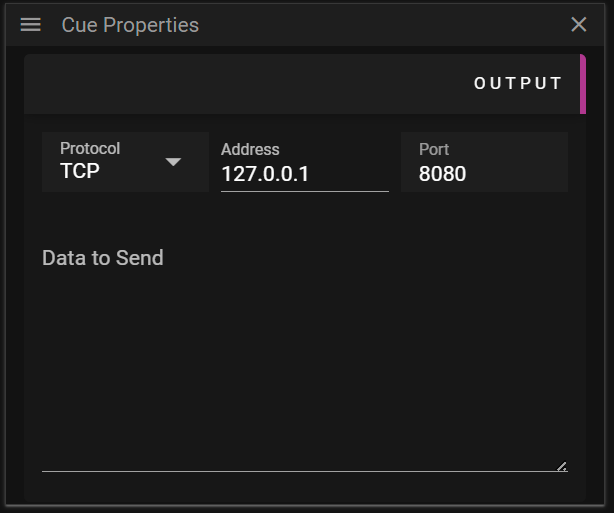
- Protocol defines the protocol to use for the data being sent.
- TCP protocol.
- UDP protocol.
- Address defines the address of the device that should receive the data.
- Data to Send defines the data, in text, that should be sent.
PLAYBACK CONTROL
The Playback Control section allows you to edit data related to control cues. A control cue can be used to edit the time and state of one or multiple Timelines.
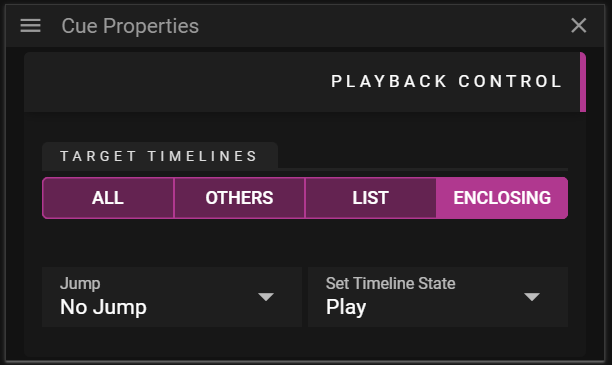
- Target Timelines defines which Timeline(s) that are affected by the Timeline Actions.
- All makes the Timeline Actions affect all Timelines.
- Others makes the Timeline Actions affect all but the Timeline in which the control cues exist.
- List makes the Timeline Actions affect all Timelines checked in the Include drop-down.
- Timeline Actions:
- Jump defines if the player should make a jump when the show reaches the cue.
- No Jump
- To Time
- To Cue
- Target Cue defines a cue Name to jump to.
- First searches for the closest cue residing after the control cue. If no match is found it then searches for cues residing before the control cue.
- Backwards to Cue defines a cue Name to jump backwards to.
- Only searches for cues residing before the control cue.
- Set Timeline State defines the state of the timeline when the show reaches the cue.
- Play
- Pause
- Stop
- Jump defines if the player should make a jump when the show reaches the cue.
CHANNEL MAPPING
The Channel section allows you to edit data related to audio cues. See Audio and channel mapping for usage
SIZE
The Size section allows you to edit data related to the size of a 3D model.
Imported 3D models are automatically scaled to fit a 1000 x 1000 x 1000 pixel cube.
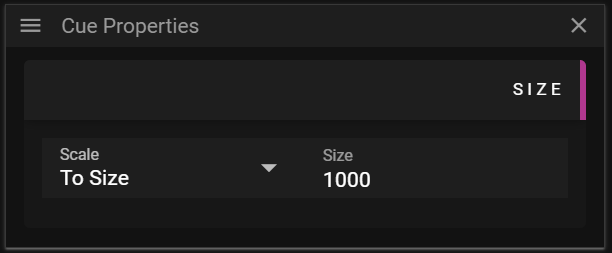
- Scale defines what method to use for setting the size.
- To Size allows you to control the maximum extent (width, height or depth) of a 3D model.
- By Factor allows you to set a uniform scale factor of the model.
- If you set this value to 1.0 you will get the original size of the 3D model.
If you want to perform non-uniform scaling you need to edit your 3D model outside Producer.
There is more information about 3D models here.
SURFACE
The Surface section allows you to edit data related to the surface of a 3D model.
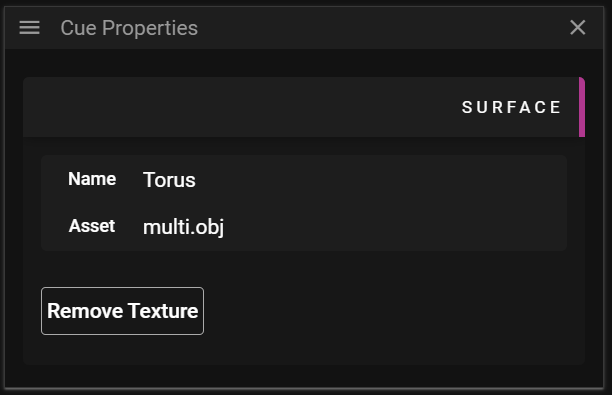
- Name shows the name of the mesh.
- Asset shows the name of the asset file that is referenced.
- Remove Texture allows you to remove media that has been applied to the mesh surface.
There is more information about 3D models here.
CONDITIONS
The Conditions section controls whether a cue is active during playback.
- Enabled - Cue plays normally.
- Disabled - Cue is skipped during playback. Disabled cues are shown with a grey striped overlay and reduced opacity on the timeline, making them easy to identify.
- Expression - Cue plays only when the expression evaluates to true. This provides powerful show control capabilities that can respond to external inputs or variable states.
For detailed information about conditional expressions, see Conditionals.
FAQ
Q. How does Looping work with In-time?
A. If you have set In-time to non-zero only the first iteration of the looping will have the initial frames trimmed (according to the In-time). Later iterations will use the full length of the asset.
Q. I have locked a cue. Can this cue be updated in any way?
A. Yes, if the cue is using a Dynamic Asset it will still be updated if an asset is updated with a new version.