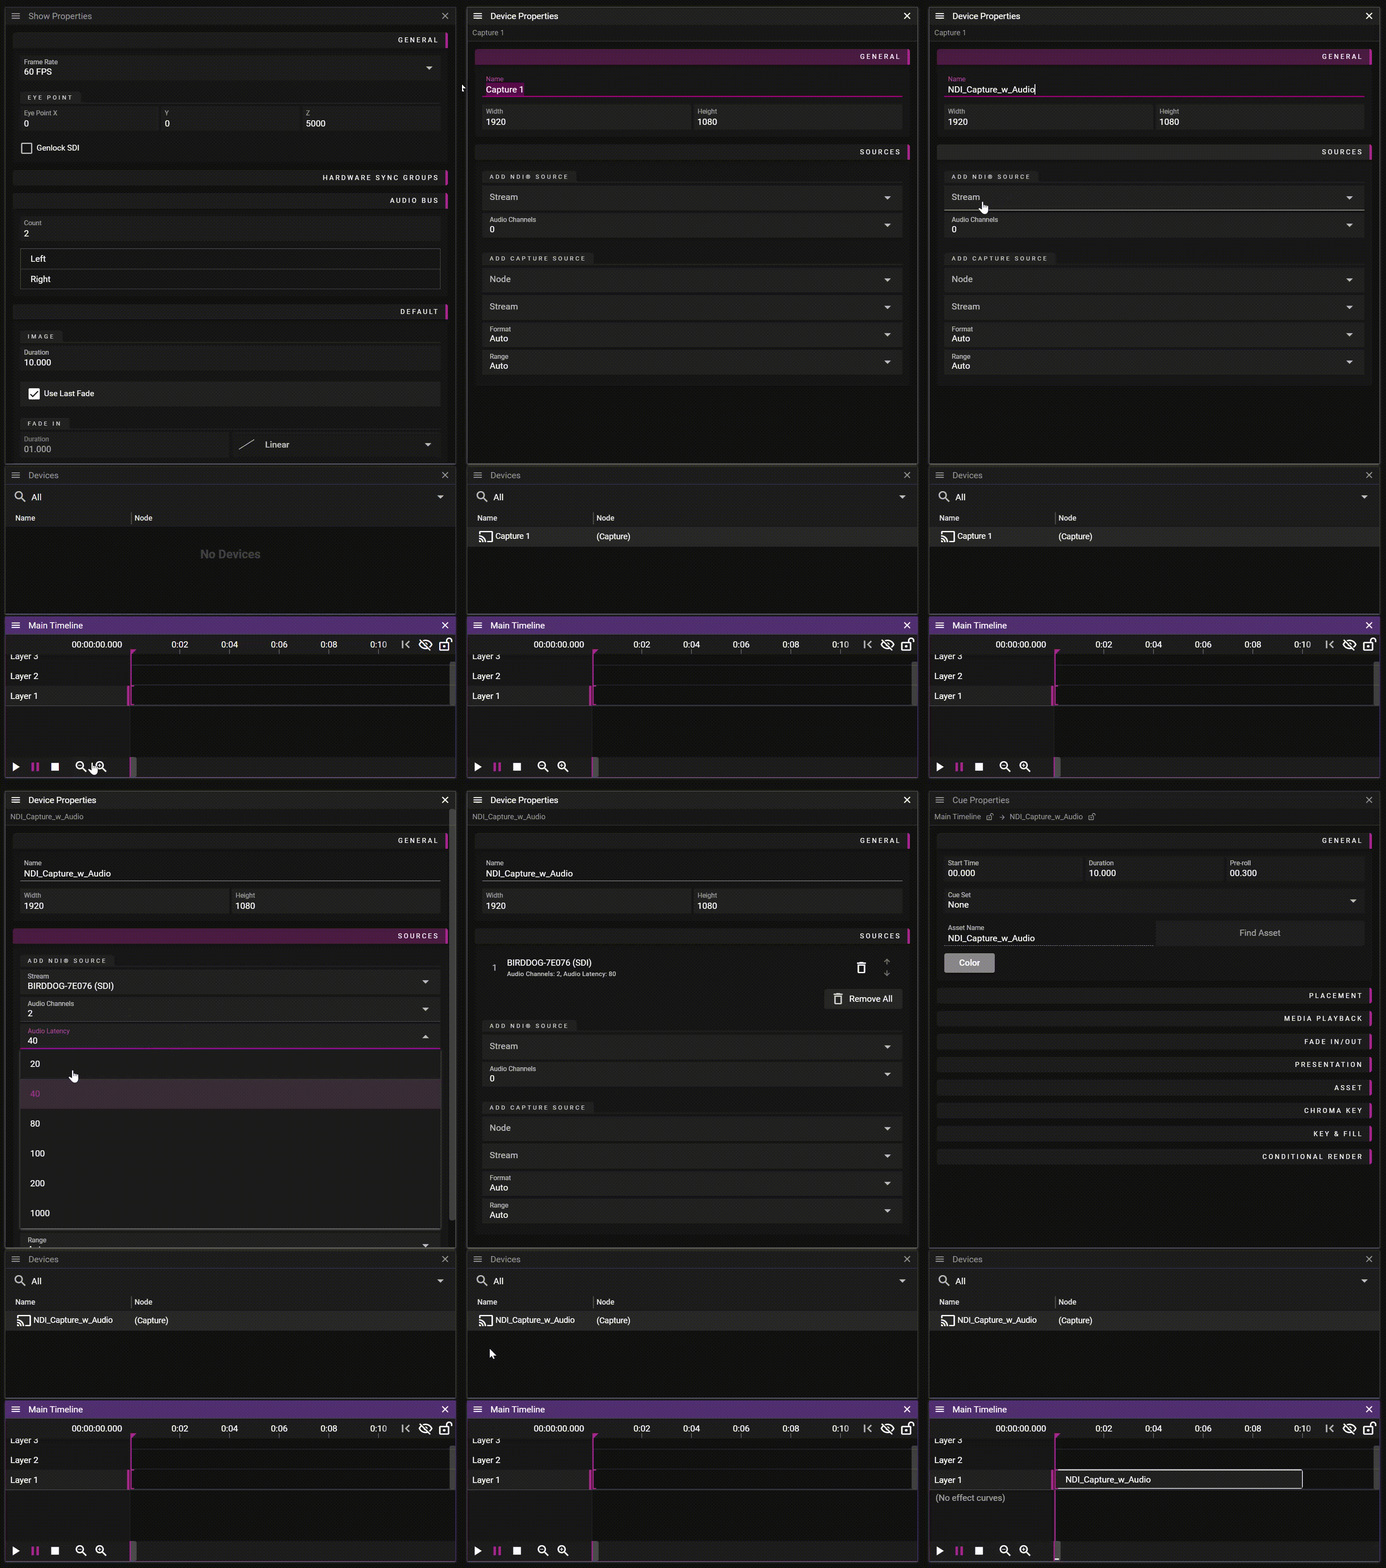
AUDIO NDI CAPTURE
An NDI stream containing both video and audio can be captured on any node in the system and the node will process both the video stream and the audio stream locally.
To add processing of the NDI audio stream, you need to set up the number of incoming audio channels when the NDI capture device is created. The audio bus routing should also be set when you create the NDI capture device, and this cannot be changed after the capture device is created.
How to create and use an NDI capture device with audio, step by step:
- Right-click in the Device window and select Add Capture Device.
- Assign a relevant name to the capture device.
- Setup the Width / Hight for capture source.
- Select the NDI stream to receive in the drop-down list under ADD NDI SOURCE / Stream.
- Select the number of audio channels to receive: 1, 2, 4 or 8 channels.
- Select the Audio Latency: 20, 40, 80, 100, 200 or 1000 milliseconds.
- Set the audio bus matrix to map each NDI capture input channel to a specific audio bus.
- Press the Add button to create the stream.
To use the NDI capture device, simply drag the device from the Device window into a layer on a timeline to create a capture cue.

NOTE 1: Only NDI streams that send audio in an uncompressed format (PCM) can be used as an audio input. It will not work with NDI streams using MP3, ACC or any other compressed audio format.
NOTE 2: The audio stream is only received and connected to the audio buses on the local node. That means only a local audio device can playback the NDI audio signal.