ASSET MANAGER WEB USER INTERFACE
You can access the Asset Manager directly via the network by using a standard web browser and connecting to the Asset Manager on port 3023.
WEB ADDRESS
To access the Asset Manager running on the local computer, type the following in the web browser address field:
HTTP://localhost:3023
or
HTTP://127.0.0.1:3023
To access the Asset Manager running on a remote computer with the IP-number 192.168.0.100, type the following in the web browser address field:
HTTP://192.168.0.100:3023
WEB VIEW
Once connected to the Asset Manager, you will see a list of all assets and folder in the Asset Manager.

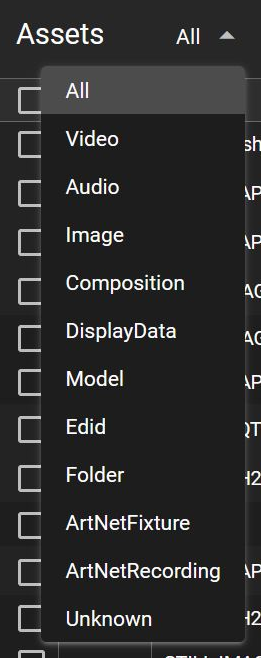
 1. Assets list This is a drop-down list with the asset types to be viewed in the web UI.
Default is All but any single type of asset can be selected, for example Video, Audio, Image etc.
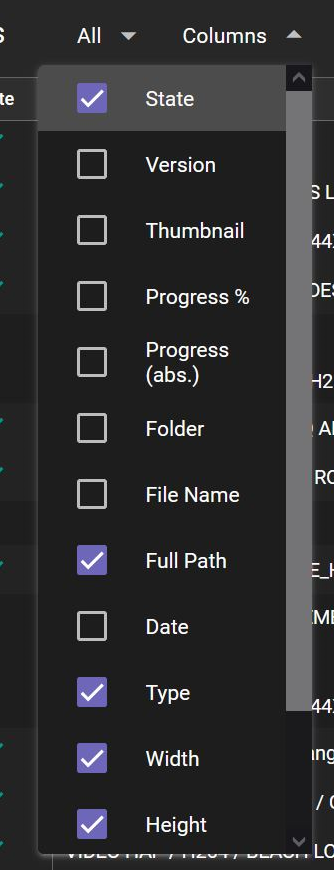
 2. Columns This is a drop-down list to select which column to show for each listed item. Multiple columns can be selected for a more customized view.
3. Search field You can search for an asset in the database by entering a complete word, or part of a word, in its name. You can also search for a specific file extension, for example jpg.
4. Upload files Clicking on the icon will open a file dialog to add a specific file to the asset database.
5. Upload folder Clicking on the icon will open a file dialog to add a folder containing files to the asset database.
6. Create folder Clicking on the icon will create a new folder in the asset database.
Folder Views
- Clicking any segment inside of any of the asset paths will change the view to show only the assets in this particular folder and the asset paths will be relative to the selected view.
- The currently selected view is represented by a path in the top left corner (hidden by default).
- You can go back up the file hierarchy to any of the parent folders by clicking a segment in this path.
ADDING ASSETS IN WEB UI
You can add assets to the Asset Manager in two ways:
-
By clicking the two icons top right, Upload files or Upload folder. Both these buttons will open a file dialog allowing you to select a single file or a folder containing multiple files to be added to the Asset Manager.
-
By selecting the files or folders from a open file window and drag-dropping them to the Asset Manager web UI.
After the file/folder is added, the files will be optimized and imported to the Asset Manager database and there will be a visible progress bar indicating the status of the import/optimization.
DELETING ASSETS IN THE WEB UI

Click the checkbox (1) next to the file or folder to be deleted. Click the Delete (2) button in the lower right corner to delete the selected items. Note: This action cannot be undone.
WARNING
-
Be careful when you delete an asset! The system does not check if the asset is used in an old or currently loaded show. It is the user's responsibility to ensure that a used asset is not deleted.
-
Deleting a folder will also delete all assets inside the folder.
-
You cannot undo the deletion of a folder or an asset in the web UI.