STAGE
The Stage window in Producer has two main purposes:
- Preview the show.
- Edit the show.
COORDINATE SYSTEM
Stage uses a right-handed coordinate system with a horizontal X-axis (red), a vertical Y-axis (green), and the Z-axis representing depth (blue). It is possible to visualize the coordinate system by holding your right hand in front of you. Hold your hand so that the thumb points to the right, your index finger points up and the middle finger points towards you. These three fingers then represent the x-, y- and z-axis where the:
- Thumb points along the positive x-axis.
- Index finger points the along positive y-axis.
- Middle finger points the along positive z-axis.
MENU
You can access the Stage menu from the top left corner of the window. It can also be found at the top menu bar of Producer under Stage.
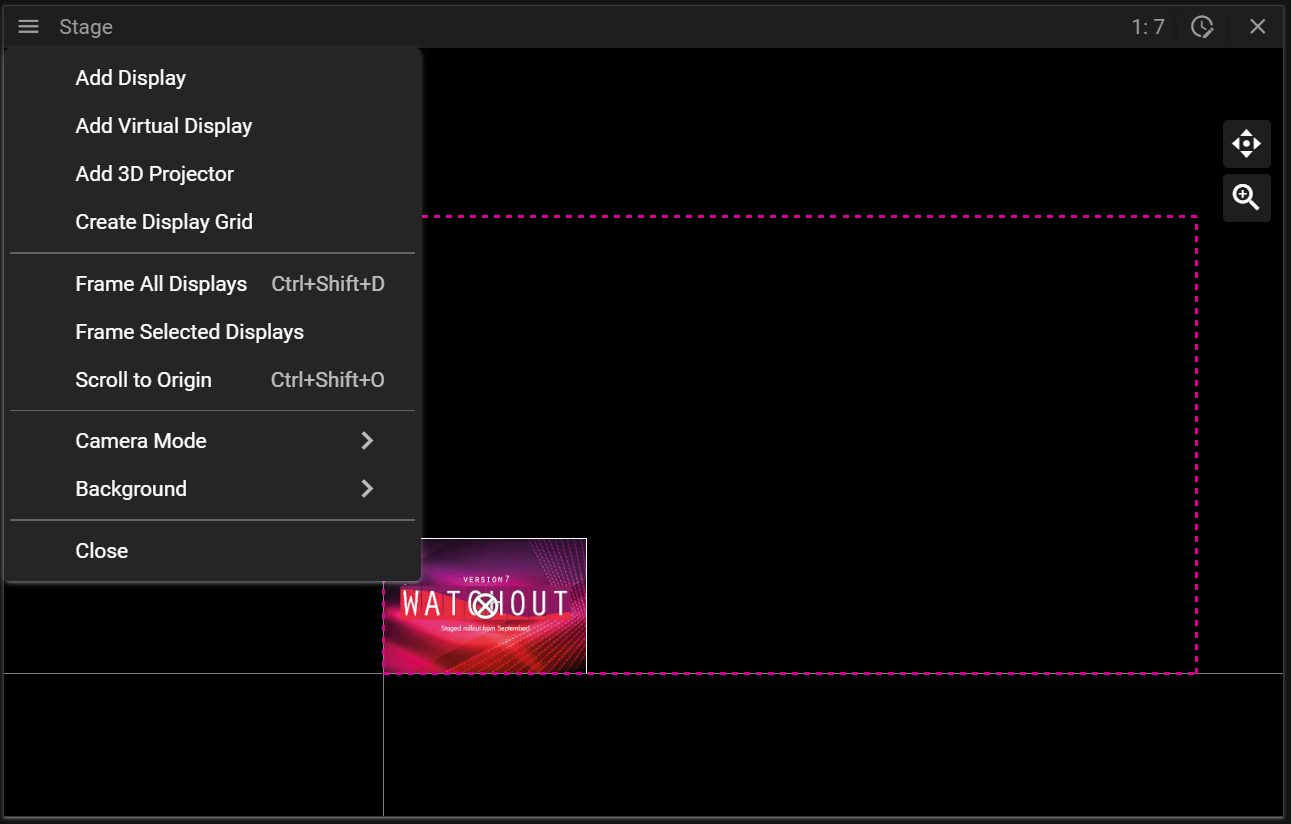
- Add Display creates a new display.
- Add Virtual Display creates a new virtual display.
- Add 3D Projector creates a new projector.
- Create Display Grid opens a dialog allowing you to add multiple displays in a single operation.
- Frame All Displays will change the scale of Stage so that all displays become visible.
- Note that this does only work in Default mode.
- Frame Selected Displays works like Frame All Displays but only by using the displays currently selected.
- Scroll to Origin resets the view to the default location.
- Camera Mode opens a sub menu allowing you to switch between different camera modes.
- Background allows you to change the background in Stage.
- Close the Stage window.
EDIT MODES
There are two edit modes in Stage:
- Display Edit Mode.
- Cue Edit Mode.
You can toggle between the edit modes by clicking the top bar in Stage. Notice that the color of the top bar changes depending on which edit mode you are in.
In display edit mode you can select and edit displays and in cue edit mode you can edit cues.

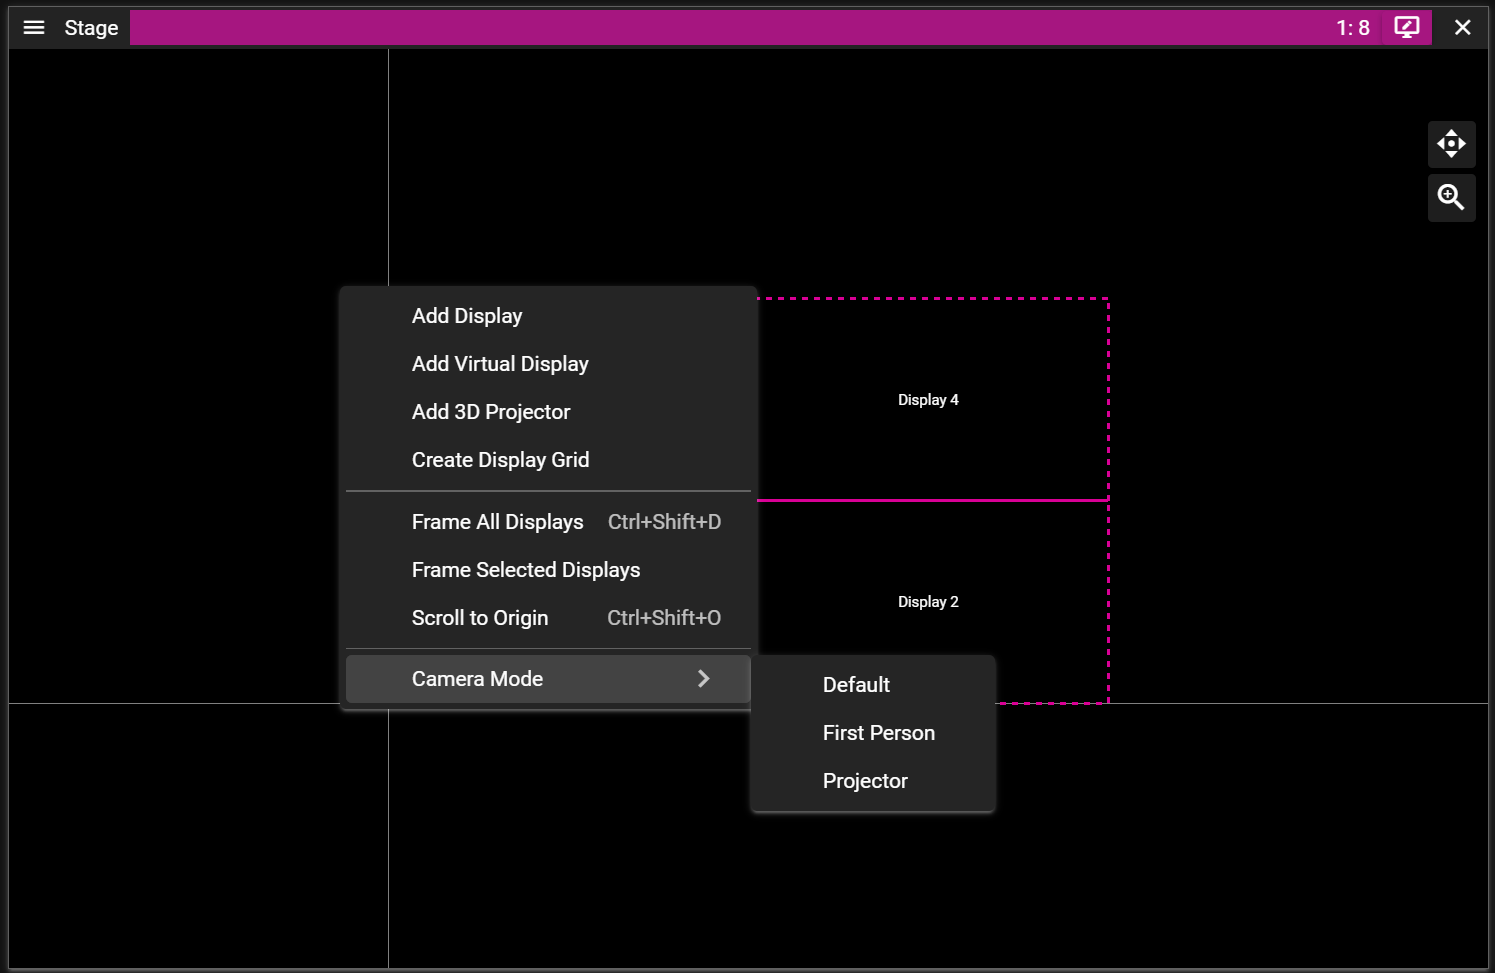
CAMERA MODE
Stage has three camera modes:
- Default.
- First Person.
- Projector.
Right-click in the Stage window to switch between these modes based on your needs.
DEFAULT CAMERA MODE
When starting WATCHOUT Producer, the Stage window will be in the Default camera mode. This mode is ideal for creating shows without 3D content, although it still supports 3D editing.
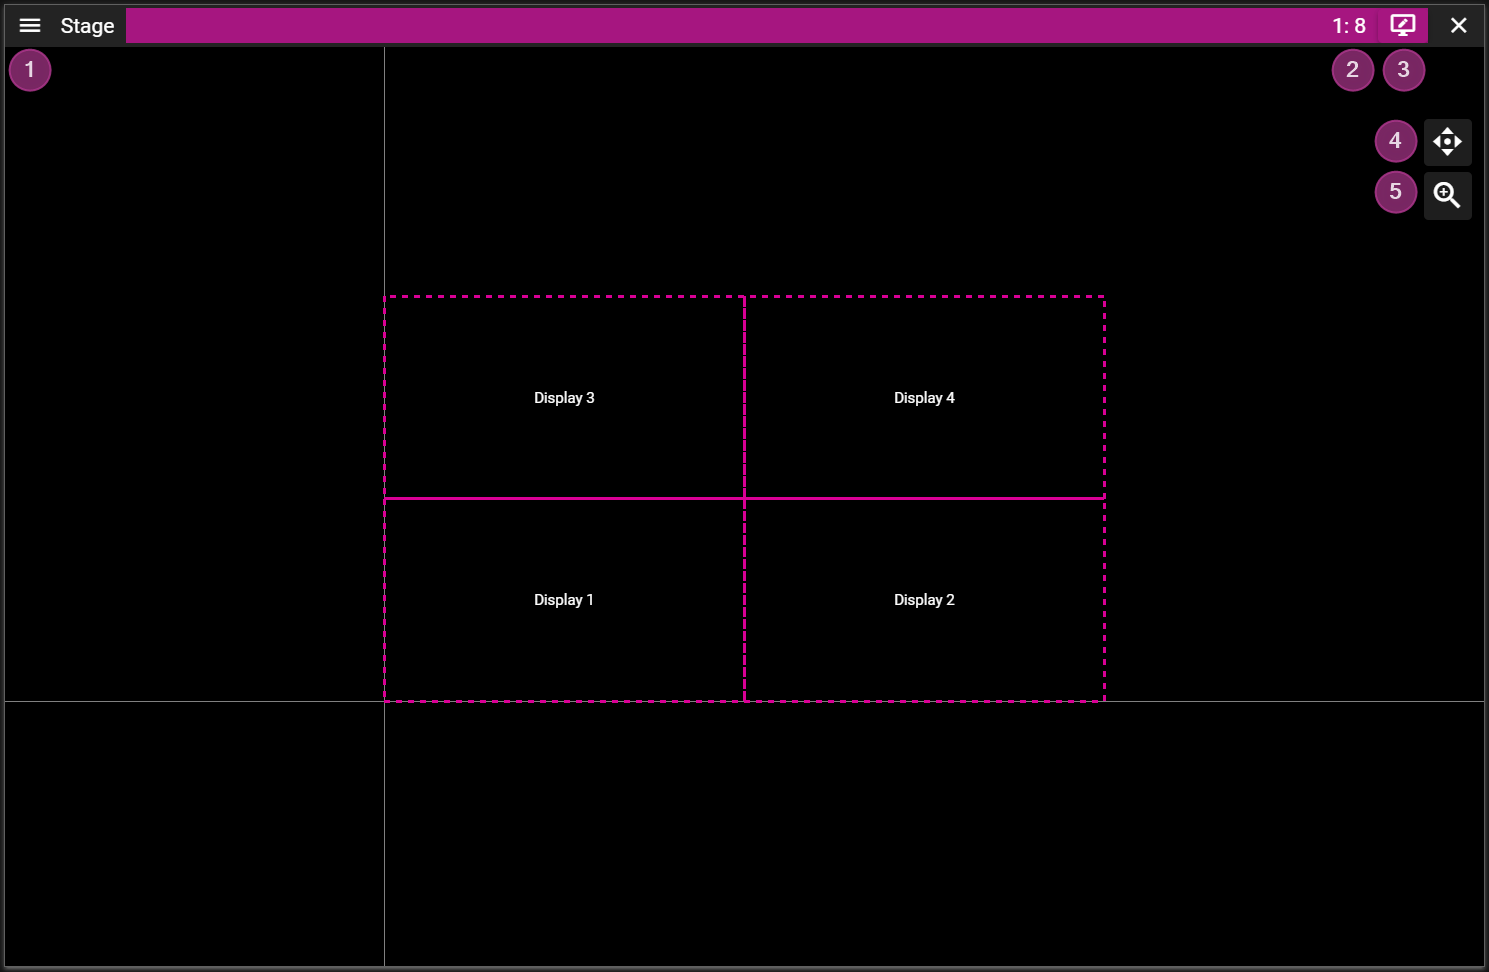
- Stage Menu.
- Stage Scale shows the active Stage scale.
- Use the mouse scroll wheel or the scale button to change the scale.
- Edit Mode can be switched by clicing on the top bar of the Stage window.
- Pan the view by clicking and dragging the pan button.
- Scale the view by clicking and dragging the scale button
- Note that you may also scale using the scroll wheel. This zoom operation will scale towards, or away from, where the mouse points.
FIRST PERSON CAMERA MODE
Designed for 3D tasks such as 3D mapping, the First Person camera mode offers greater navigation freedom compared to the Default mode.
This view uses a focus point, white sphere, to decide zoom target and what point to orbit around.
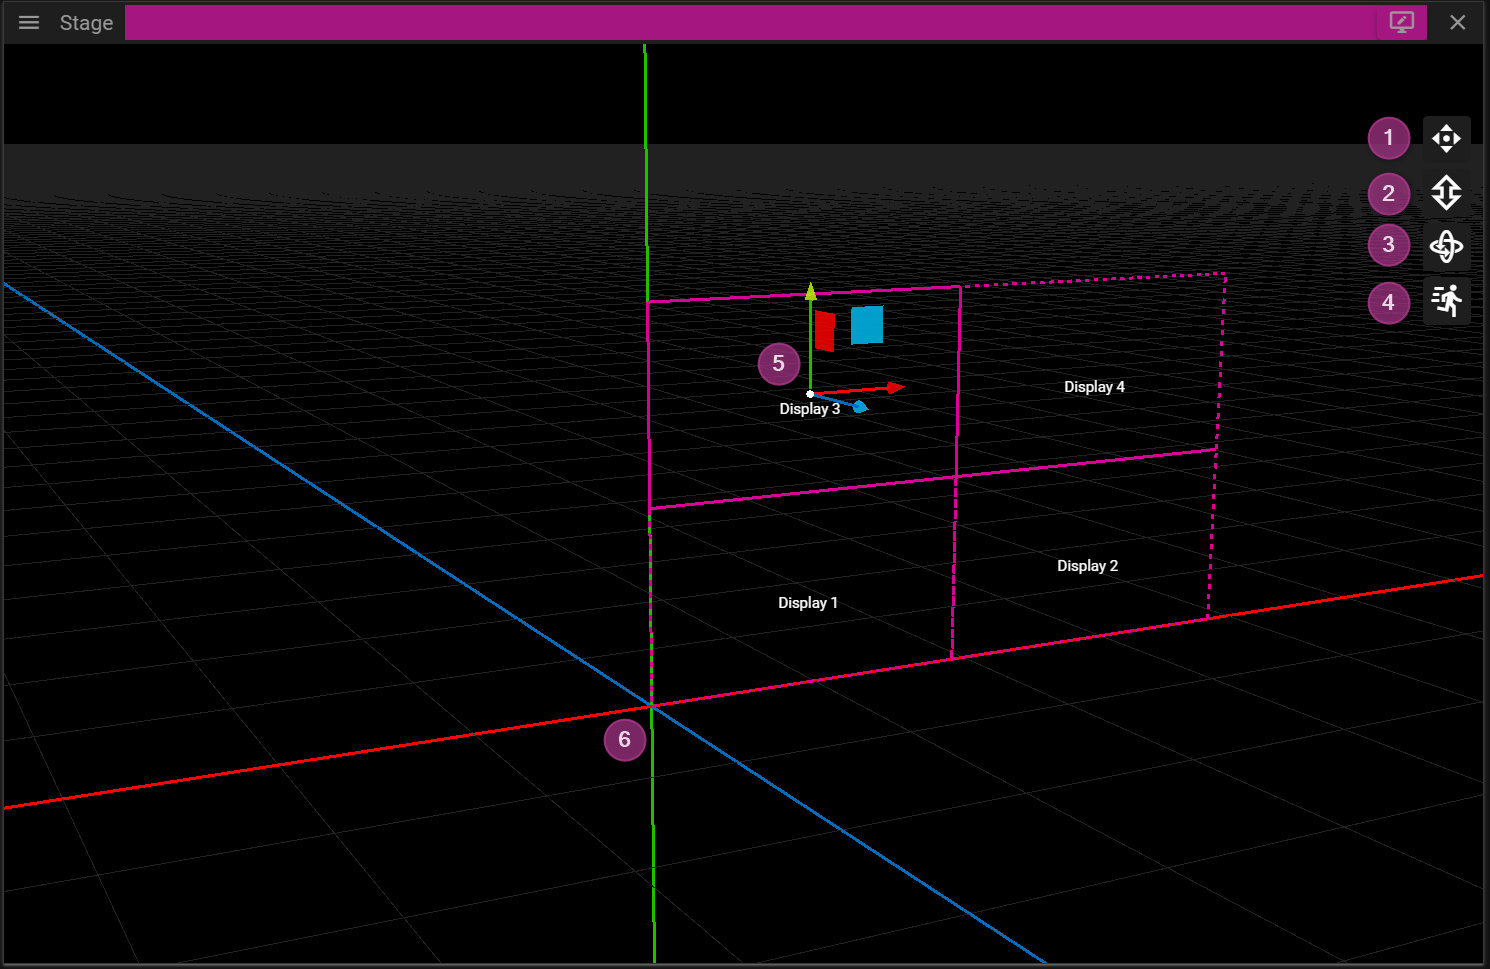
- Pan the view by clicking and dragging the pan button.
- Zoom the view by clicking and dragging the zoom button. The camera will zoom towards the focus point.
- Note that you may also zoom using the scroll wheel. This zoom operation will zoom towards (or away from) where the mouse points.
- Orbit the view around the focus point by clicking and dragging the orbit button.
- Velocity Control is used to adjust the camera movement velocity.
- Lowering the camera velocity is epspecially useful during 3D projector position fine tuning.
- Axis gizmo is used to move cues and displays in 3D. Click and drag drag an axis arrow (or a plane) to move objects.
- Notice that the positive direction of the axes are represented with arrows.
- Coordinate System origin with axes x (red), y (green) and z (blue).
PROJECTOR CAMERA MODE
In Projector camera mode, you view the virtual scene from the projector’s perspective. This is useful for projector positioning and calibration.
You may enter projector mode by either:
- Clicking on the Frame Display button (magnifying glass), in the Display Properties window.
or - By double-clicking a projector.
or - By right clicking in the Stage window.
The navigation in this mode mimics the navigation in the First Person mode with the exception that the scroll wheel zooms to target instead of zooming towards a focus point.
There is more information about the Projector mode in the 3D Mapping chapter.
MOVEMENT & SNAPPING
There are two ways to change the position of a display or cue:
- From the Properties window.
or - Inside the Stage window.
The Properties window will show a section named Position (or Position and Size) once a display or cue has been selected. Note that if you select multiple displays or cues you can edit them in a single operation.
To move a display, or cue, in the Stage window you need to click and drag it. Keep in mind that you may only select and move objects if you are in the correct Edit Mode.
If you hold the shift key you will get help lines that simplify movement along a specific axis.
During movement objects will try to snap to each other. The snapping can be toggled on/off from Edit/Snap found in the top menu bar of Producer.
You may tempoararily disable snapping by holding the ctrl key while moving an object.
STAGE TIERS
Stage Tiers are layers in the Stage window. They can be used to restrict media cues, on layers or on timelines. For example, if two overlapping displays are located on the same tier, in the Stage window, WATCHOUT will automatically create a soft edge blend between them. if you want to avoid the edge blend when two, or more, screens overlap in the Stage area, you would put them on different tiers.
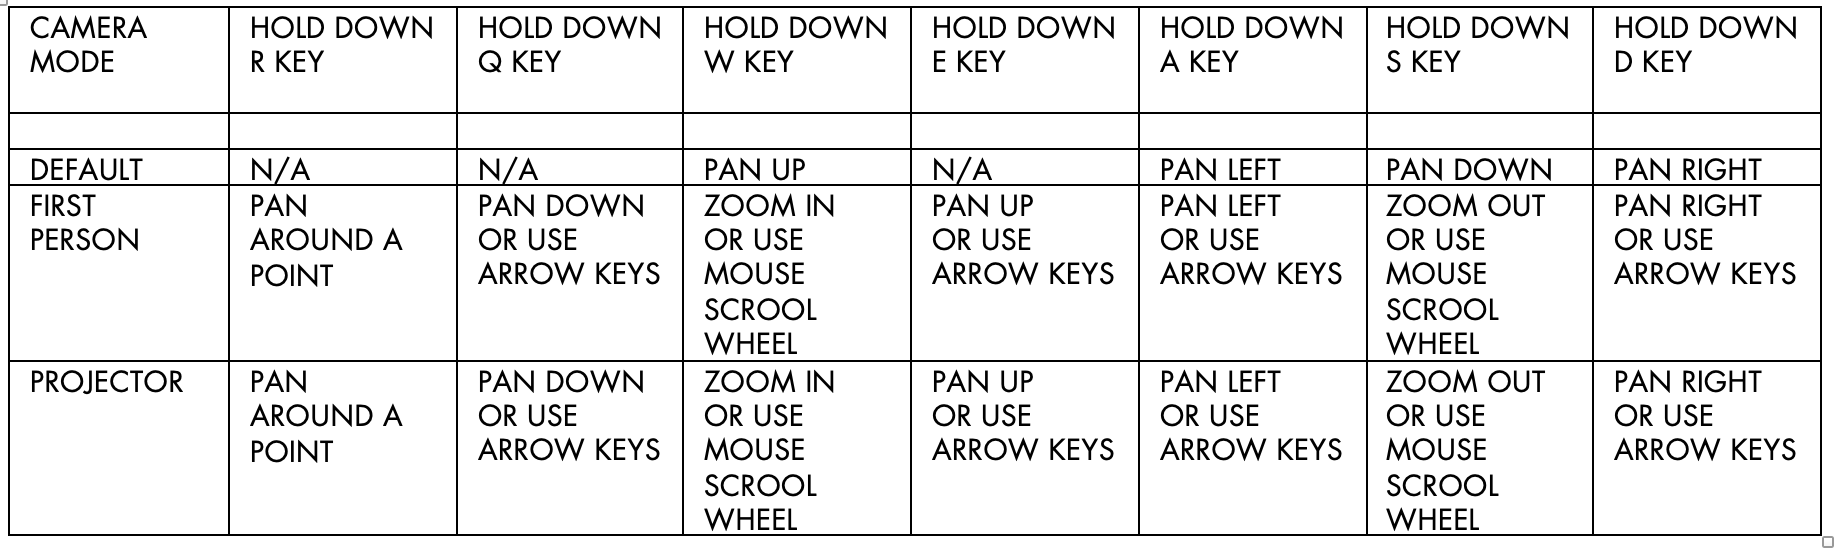
KEYBOARD NAVIGATION