ASSET MANAGER
You can think of an asset as a piece of data stored in a file, like image or audio data. The assets used to build a show in WATCHOUT are handled by the Asset Manager. The purpose of the Asset Manager is to:
- Prepare assets for being used in WATCHOUT shows.
- Organize assets.
- Share assets between projects and users.
The Asset Manager does not need to be located on the machine running Producer, it can be on any node available on your network. Since preparing assets can be a time consuming and CPU and GPU intensive task, it can be beneficial to share a powerful machine among creators.
Note that you may organize your assets into folders just like any other file system.
In order to make use of assets they need to be added to the show. This is done by either dropping them to a Timeline or to the Stage window which creates a cue that can be used to configure how the data stored in asset is visualized/played.
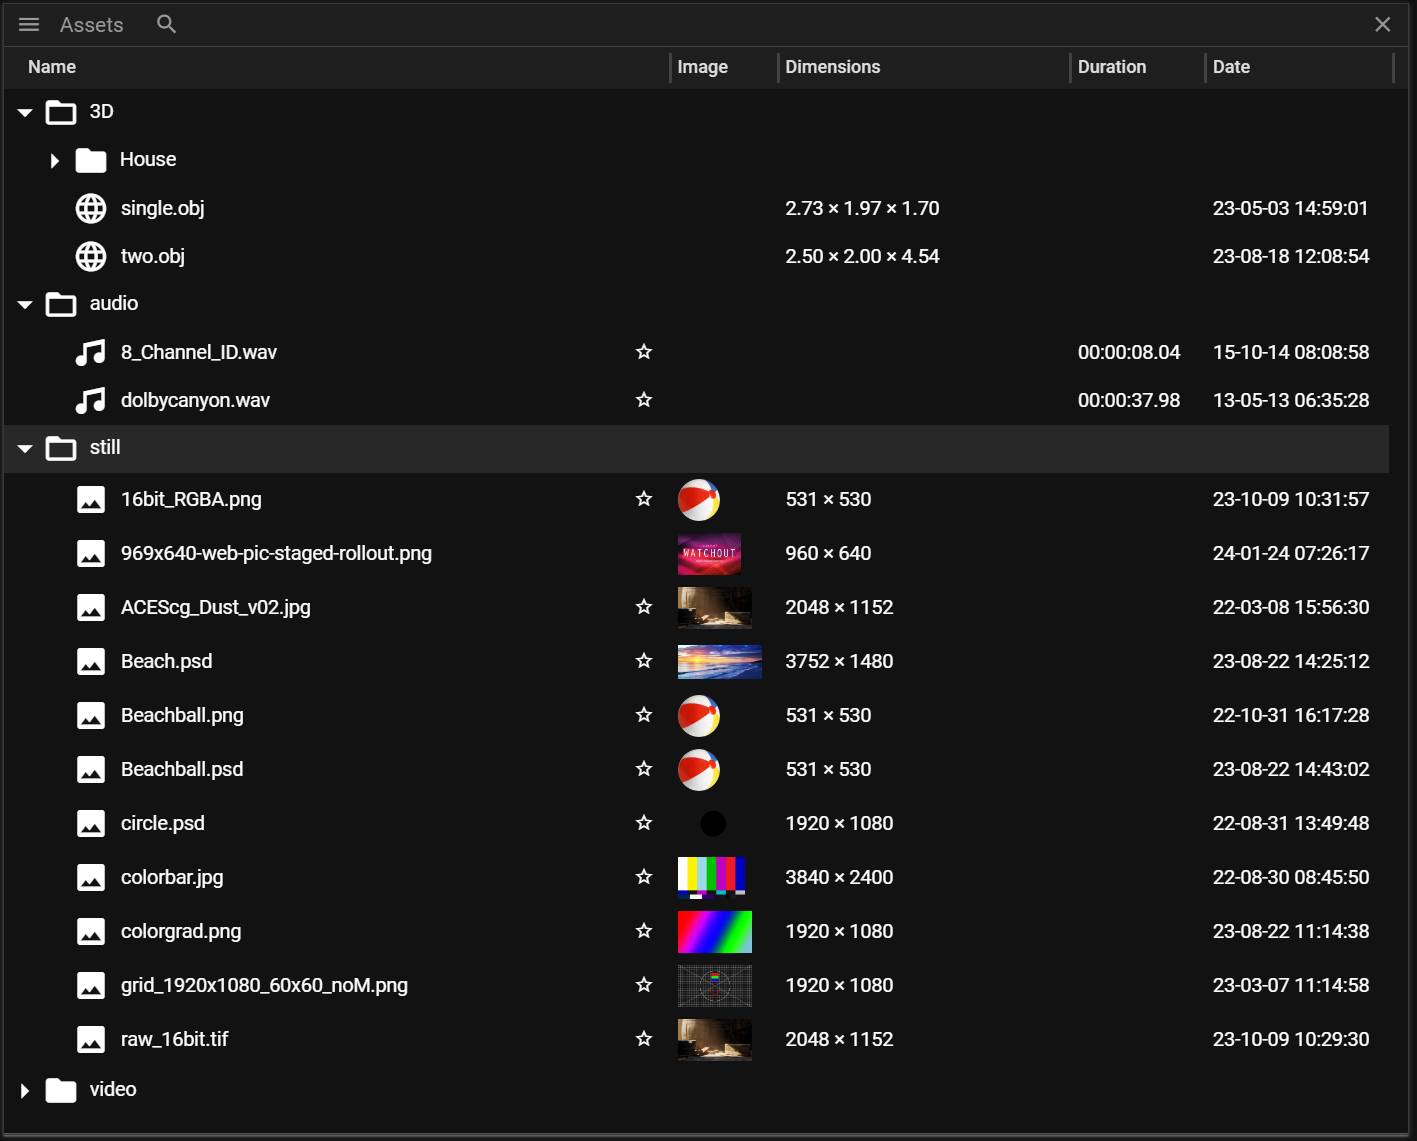
- Magnifying glass icon is used to open the search interface.
- Name will show the name of the asset. This can be edited in the Asset Properties.
- Image will show a thumbnail of the asset.
- Note that not all assets have a thumbnail.
- Dimensions shows the resolution for media and the size for 3D models.
- Note that not all assets have a dimension.
- Duration shows the duration of the asset (available for videos and audio)
- Date shows when the original file was created (this does not show when the asset was added to Producer).
ASSET TYPES
WATCHOUT supports the following asset types:
- Image (.webp, .tiff, .jpg, .png, .psd, .gif, .tga)
- Video (.mp4, .mov)
- h262, h264, h265, ProRes, NotchLC, Hap.
- Audio (.wav, .mp3, .mp4, .ogg, etc)
- 3D Model (.obj, .gltf, .glb, .3ds)
- Mpcdi (.mpcdi)
- Display settings file format.
- Composition
- A group of assets bundled together.
ASSET MANAGER MENU
The Asset Manager menu looks like this:
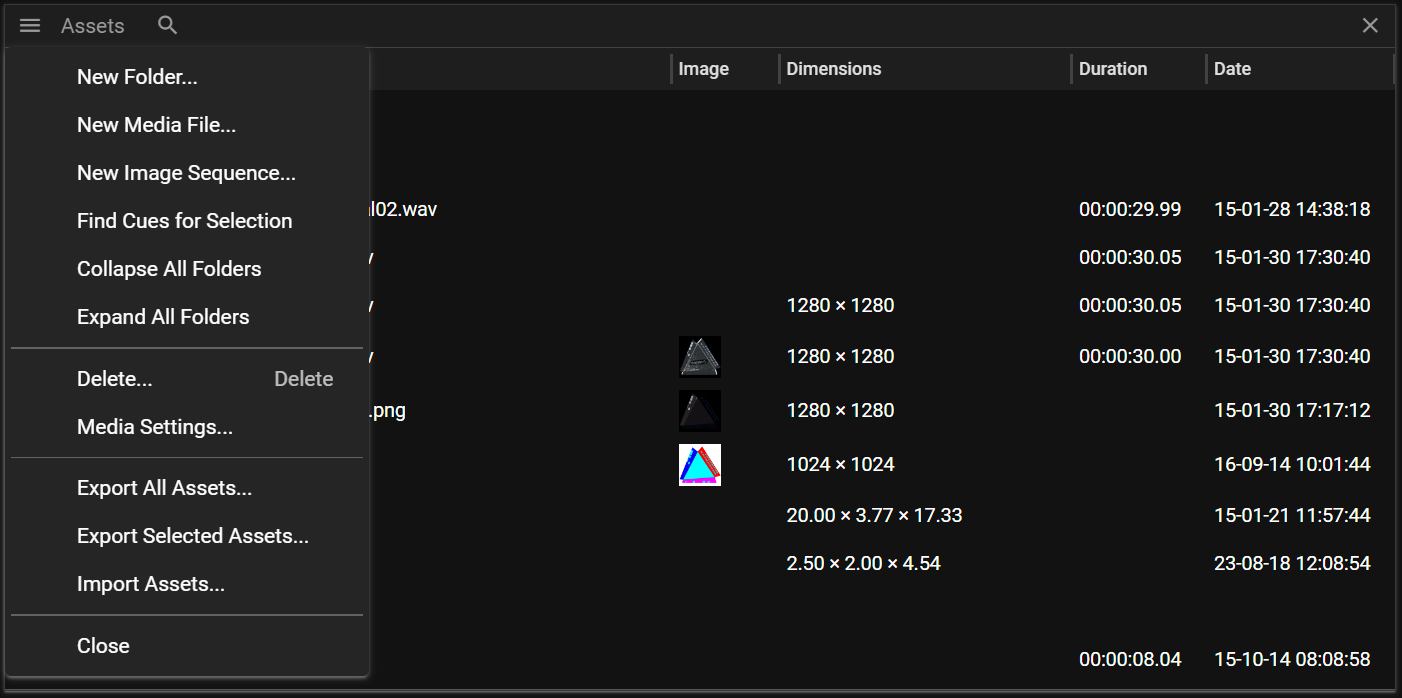
- New Folder will open a dialog where you can set the name of the folder you want to create.
- New Media File will open a dialog allowing you to add an asset.
- New Image Sequence will open a dialog allowing you to add a sequence (.tiff or .tga).
- Find Cues for Selection will search for cues referring to the selected assets. More information can be found here.
- Collapse all Folders will collapse all open folders.
- Expand all Folders will expand all closed folders.
- Delete will delete the selected assets.
- Media Settings will open a dialog allowing you to define how different formats are converted during WATHOUT asset preparation.
- Export All Assets will open a dialog allowing you bundle all assets in the Asset Manager to a package.
- Export Selected Assets will open a dialog allowing you bundle the selected assets in the Asset Manager to a package.
- Import Asset will import assets that were previously exported.
ADDING ASSETS
To add an asset to the Asset Manager you can either:
- Go to the menu and select New Media File (or New Image Sequence).
OR - Drag and drop a file from your file system to the Asset Manager.
Once the asset has been added the Asset Manager will begin to prepare the asset for being used in WATCHOUT shows. This will also produce a star that is there to convey that this is a new asset.
SELECTING ASSETS
You select an asset by clicking on it. Producer also supports holding the Control/Shift-key to alter the select operation. You can also use Control+A to select all assets in the Asset Manager.
When an asset is selected the Properties window is populated with asset information - Asset Properties.
REMOVING ASSETS
Select an asset(s) in the list and click the Delete key or select Delete in the Asset Manager menu.
FOLDERS
Producer supports importing complete folder structures which is very useful if you already organized your assets in a specific way. If you want to add a folder structure to the Asset Manager you simply drag and drop it in the Asset Manager window.
You can also create (or delete) new folders from the Asset Manager menu. If you want to move an asset to a specific folder you select and drag it to the folder you want it to reside in.
SEARCH
Click on the magnifying glass icon at the top of the Asset Manager to open the asset search interface.
To search for an asset you input text in the search field. You can further narrow down the search result by:
- Filter out a specific asset type by changing the asset type drop down.
- Filter out newly created assets (assets marked with a star).
- Filter out assets based on what cues you currently have selected on your Timeline(s).
Hide the search functionality by clicking on the cross at the far right.
FIND CUES FROM ASSETS
Sometimes it might be helpful to find cues that are using a specific asset. To do this you need to:
- Select the asset(s) of interest.
- Right-click in the Asset Manager window and select Find Cues for Selection.
- The search result is shown in the bottom part of the Asset Manager window.
The search result is interactive so you can click on the cue you want to inspect. Doing so will activate the Timeline that owns the cue and scroll to it. You can also use the down/up button to jump to next/previous in the result. Next to these buttons is a select all cues button which is useful if you want to delete all cues referring to a specific asset. Note that you can use the arrow down/up to to jump to next/previous the result.
MEDIA SETTINGS
The Media Settings can be accessed from the Asset Manager menu and it will open a dialog allowing you to define how different formats are converted during WATHOUT asset preparation. This is done by changing the Out format.
