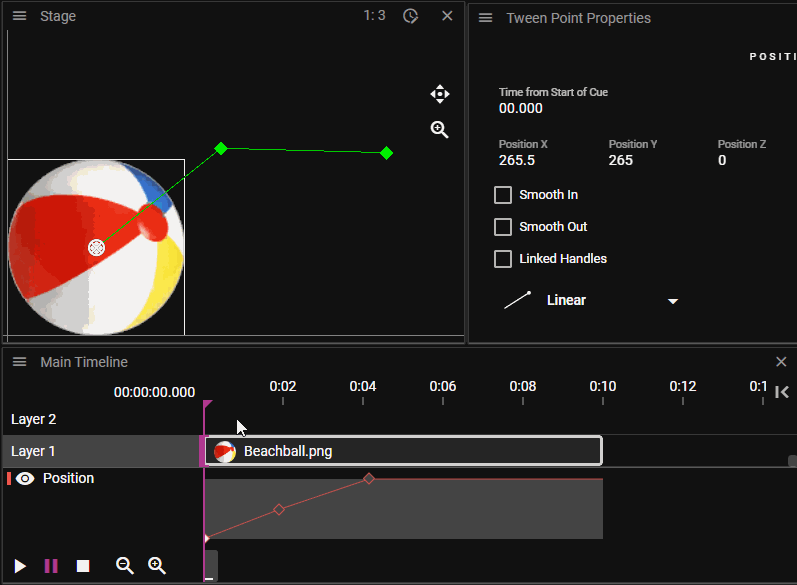
POSITION EFFECT
The Position Effect is quite different compared to other effects. Like other effects you can see the tween points in the Effect curve view. But the value of the tween points can not be changed by dragging the tween point up/down in this view. That is because the value of this Effect is the position of the Cue on Stage, which consists of three values: X, Y and Z. Thus, the Position Tween Points can also be viewed, selected and dragged in the Stage window.
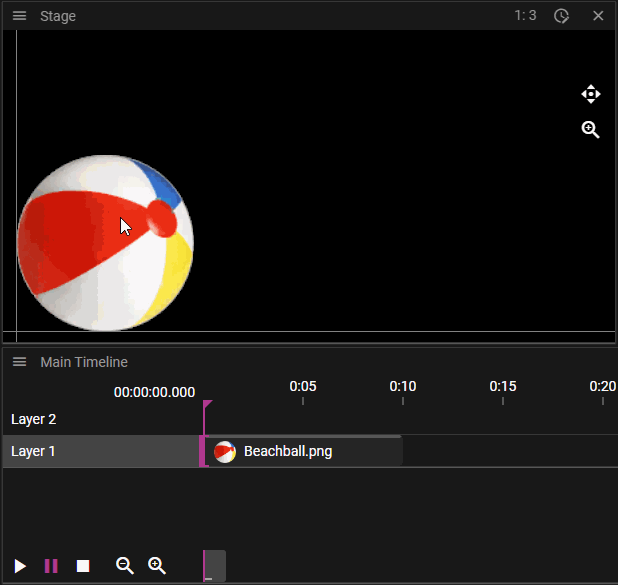
Start creating an animated Position Effect like this:
- Select a media Cue.
- Activate the Position Effect in the Effects menu, or by right clicking the Cue and locate the Position Effect that way.
- Move the Timeline marker forward a bit, eg towerds the end of the Cue.
- Click and drag the Cue in the Stage window, to a new position
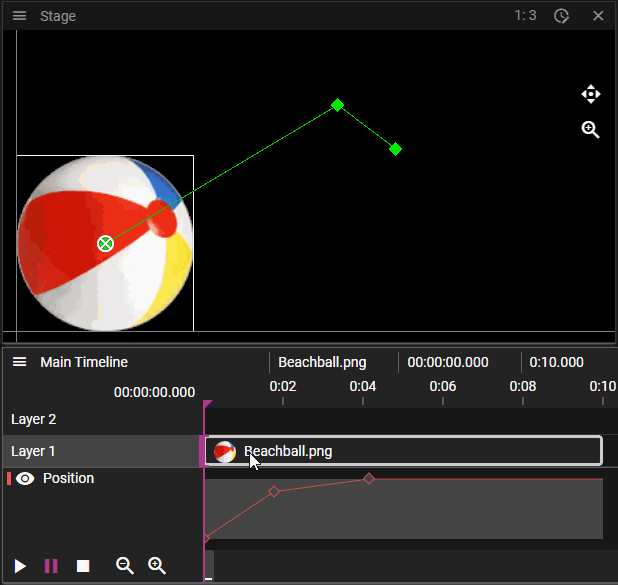
It should look something like this:
Move the Timeline marker between the two points, and you can see that the position of the Cue on Stage is animated between these two positions. You can keep adding more points by placing the Timeline marker and moving the Cue on Stage. You can also, as with other Effect curves, click on the curve in the curve view, to add more points.
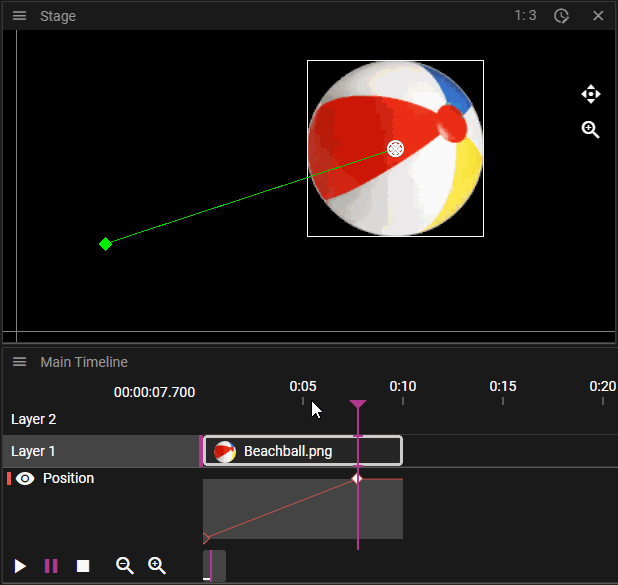
VISUALIZES MOVEMENT SPEED
The Position Effect curve does not represent the value of the Position Effect, but the progress along the Position Effect curve. This is why the first point is allways at the bottom of the curve view, as this is the beginning of the curve, and the last point is at the top, corresponding of the end of the curve. To demonstrate how this can be helpful, here is an example:

As you can see, the two last points are placed close to each other on the Stage, but on the Timeline, in the Effect curve view, you can see that they are spaced further apart. This means that the movement speed will differ when playing back this animation, it will slow down when moving past the second point. You can see this in the Effect curve, by looking at the incline of the curve: higher incline means higher speed (1), and lower incline means lower speed (2).
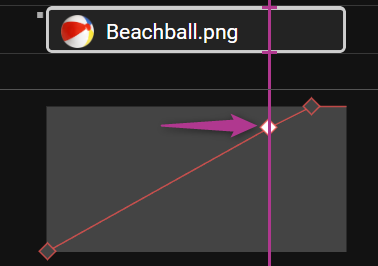
By moving the middle point to the left on the Timeline, until the incline of the segment before and after the point are equal, you get movement with the same speed across the animation.
POSITION EFFECT PROPERTIES
Here you can, besides setting the expressions to control the three values of this Effect (X, Y and Z), set the ORIENT CUE ALONG PATH property of the Effect. Setting this property will make the Cue rotate, to orient itself along the direction of the movement curve. It may look something like this: