3D MAPPING
3D mapping refers to projecting media to fit onto object surfaces, such as statues or cars. The process includes positioning projectors and objects in the real world, creating a virtual scene in WATCHOUT, then calibrating projectors, and projecting media. Calibration involves aligning virtual and real-world points.
To setup 3D mapping you will need:
- One or more objects to project media on.
- One or more 3D models representing the objects you want to project your media on.
- One or multiple projectors.
The setup process can be divided into the following steps:
- Position your projector(s) and object(s) you want to project on in the real world.
- Prepare a virtual scene in Producer by adding and position 3D models and projectors matching the real world from the first step.
- Calibrate each projector by trying to align the virtual scene with the real scene.
- Play media on the surface of the object(s).
In the following sections you can learn about how to prepare a virtual scene and how to align that scene with reality through a calibration step.
VIRTUAL SCENE
To prepare a virtual scene you can begin by dropping a file containing a 3D model representing the real object(s) you want to project on. It is very important that the 3D model(s) closely matches the real object(s) from a proportion perspective, otherwise it will be very hard or even impossible to perform the calibrationstep later. When the Asset Manager has finished preparing the 3D model it can be dragged from the Assets window to a layer on the timeline. It can also be dropped directly to the Stage window.
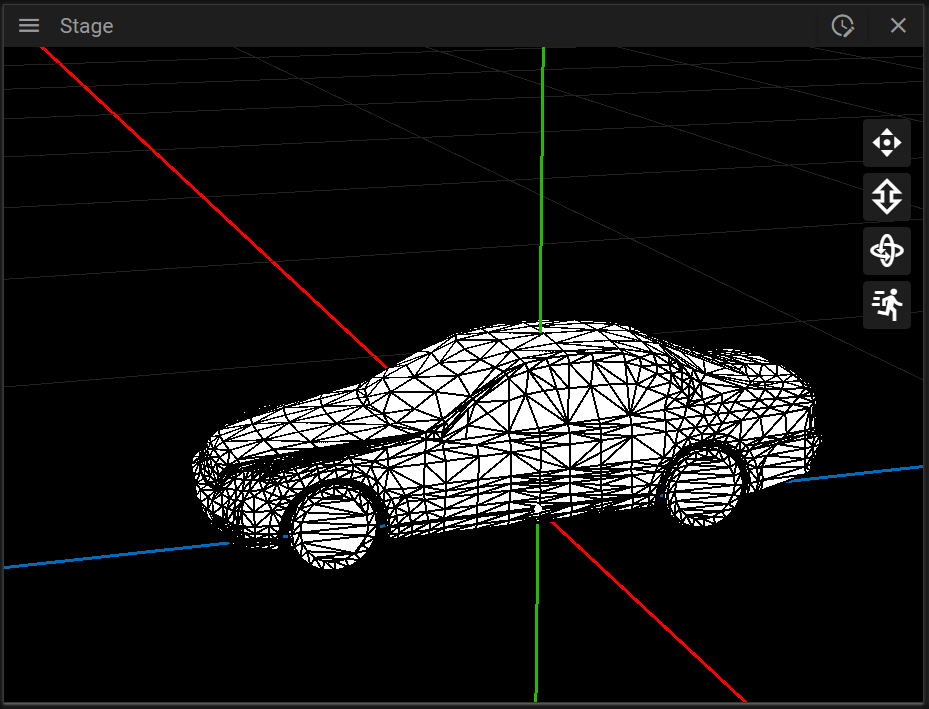
It is recommended to switch to the [First Person](../stage/stage.md#first-person) camera mode when working with 3D models since this allows you to view and inspect the 3D model freely. A model that still does not have any media/texture applied to it will be rendered using wireframe.
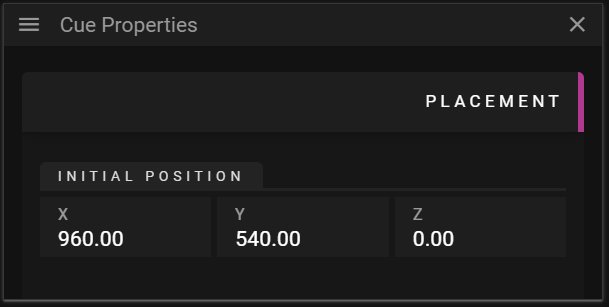
You can change the position of the 3D model by using the axis gizmo or by inputting values in the Cue Properties window.
Note that the location of the 3D model in the virtual scene is not important for the 3D mapping to work, it is the relation between the virtual projector and the 3D model that is important. For instance, the 3D model can be placed far away on the x-axis, as long as the projector can “see” it from an angle matching the real-world relationship.
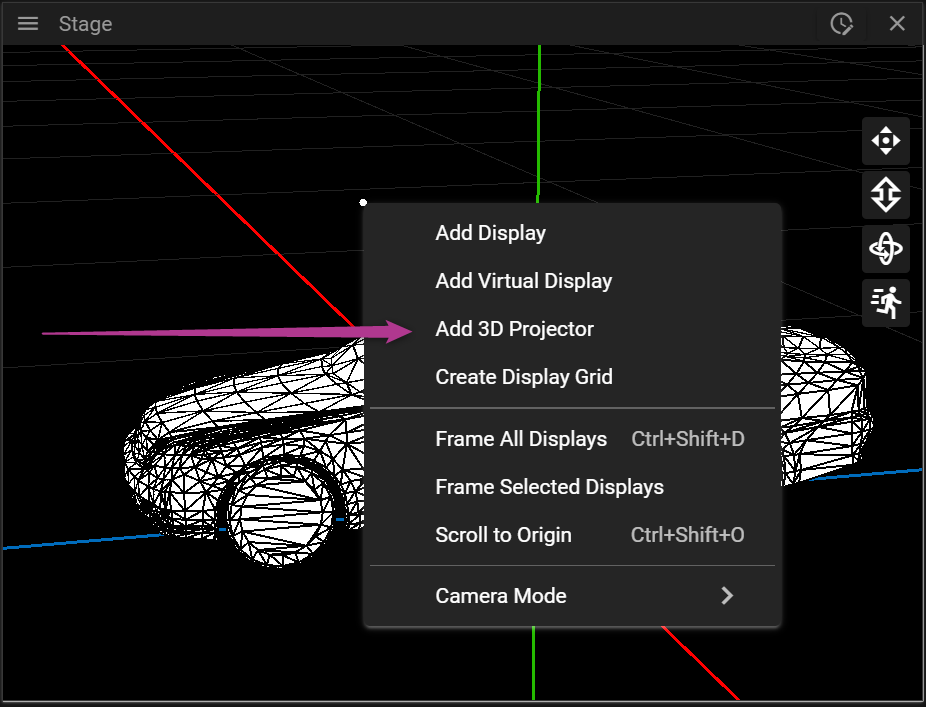
Once the 3D model(s) has been placed in the scene the next step is to add a projector in Producer and position the projector so it can “see” the 3D model(s). To add a projector you can right-click in the Stage window and select Add 3D Projector.
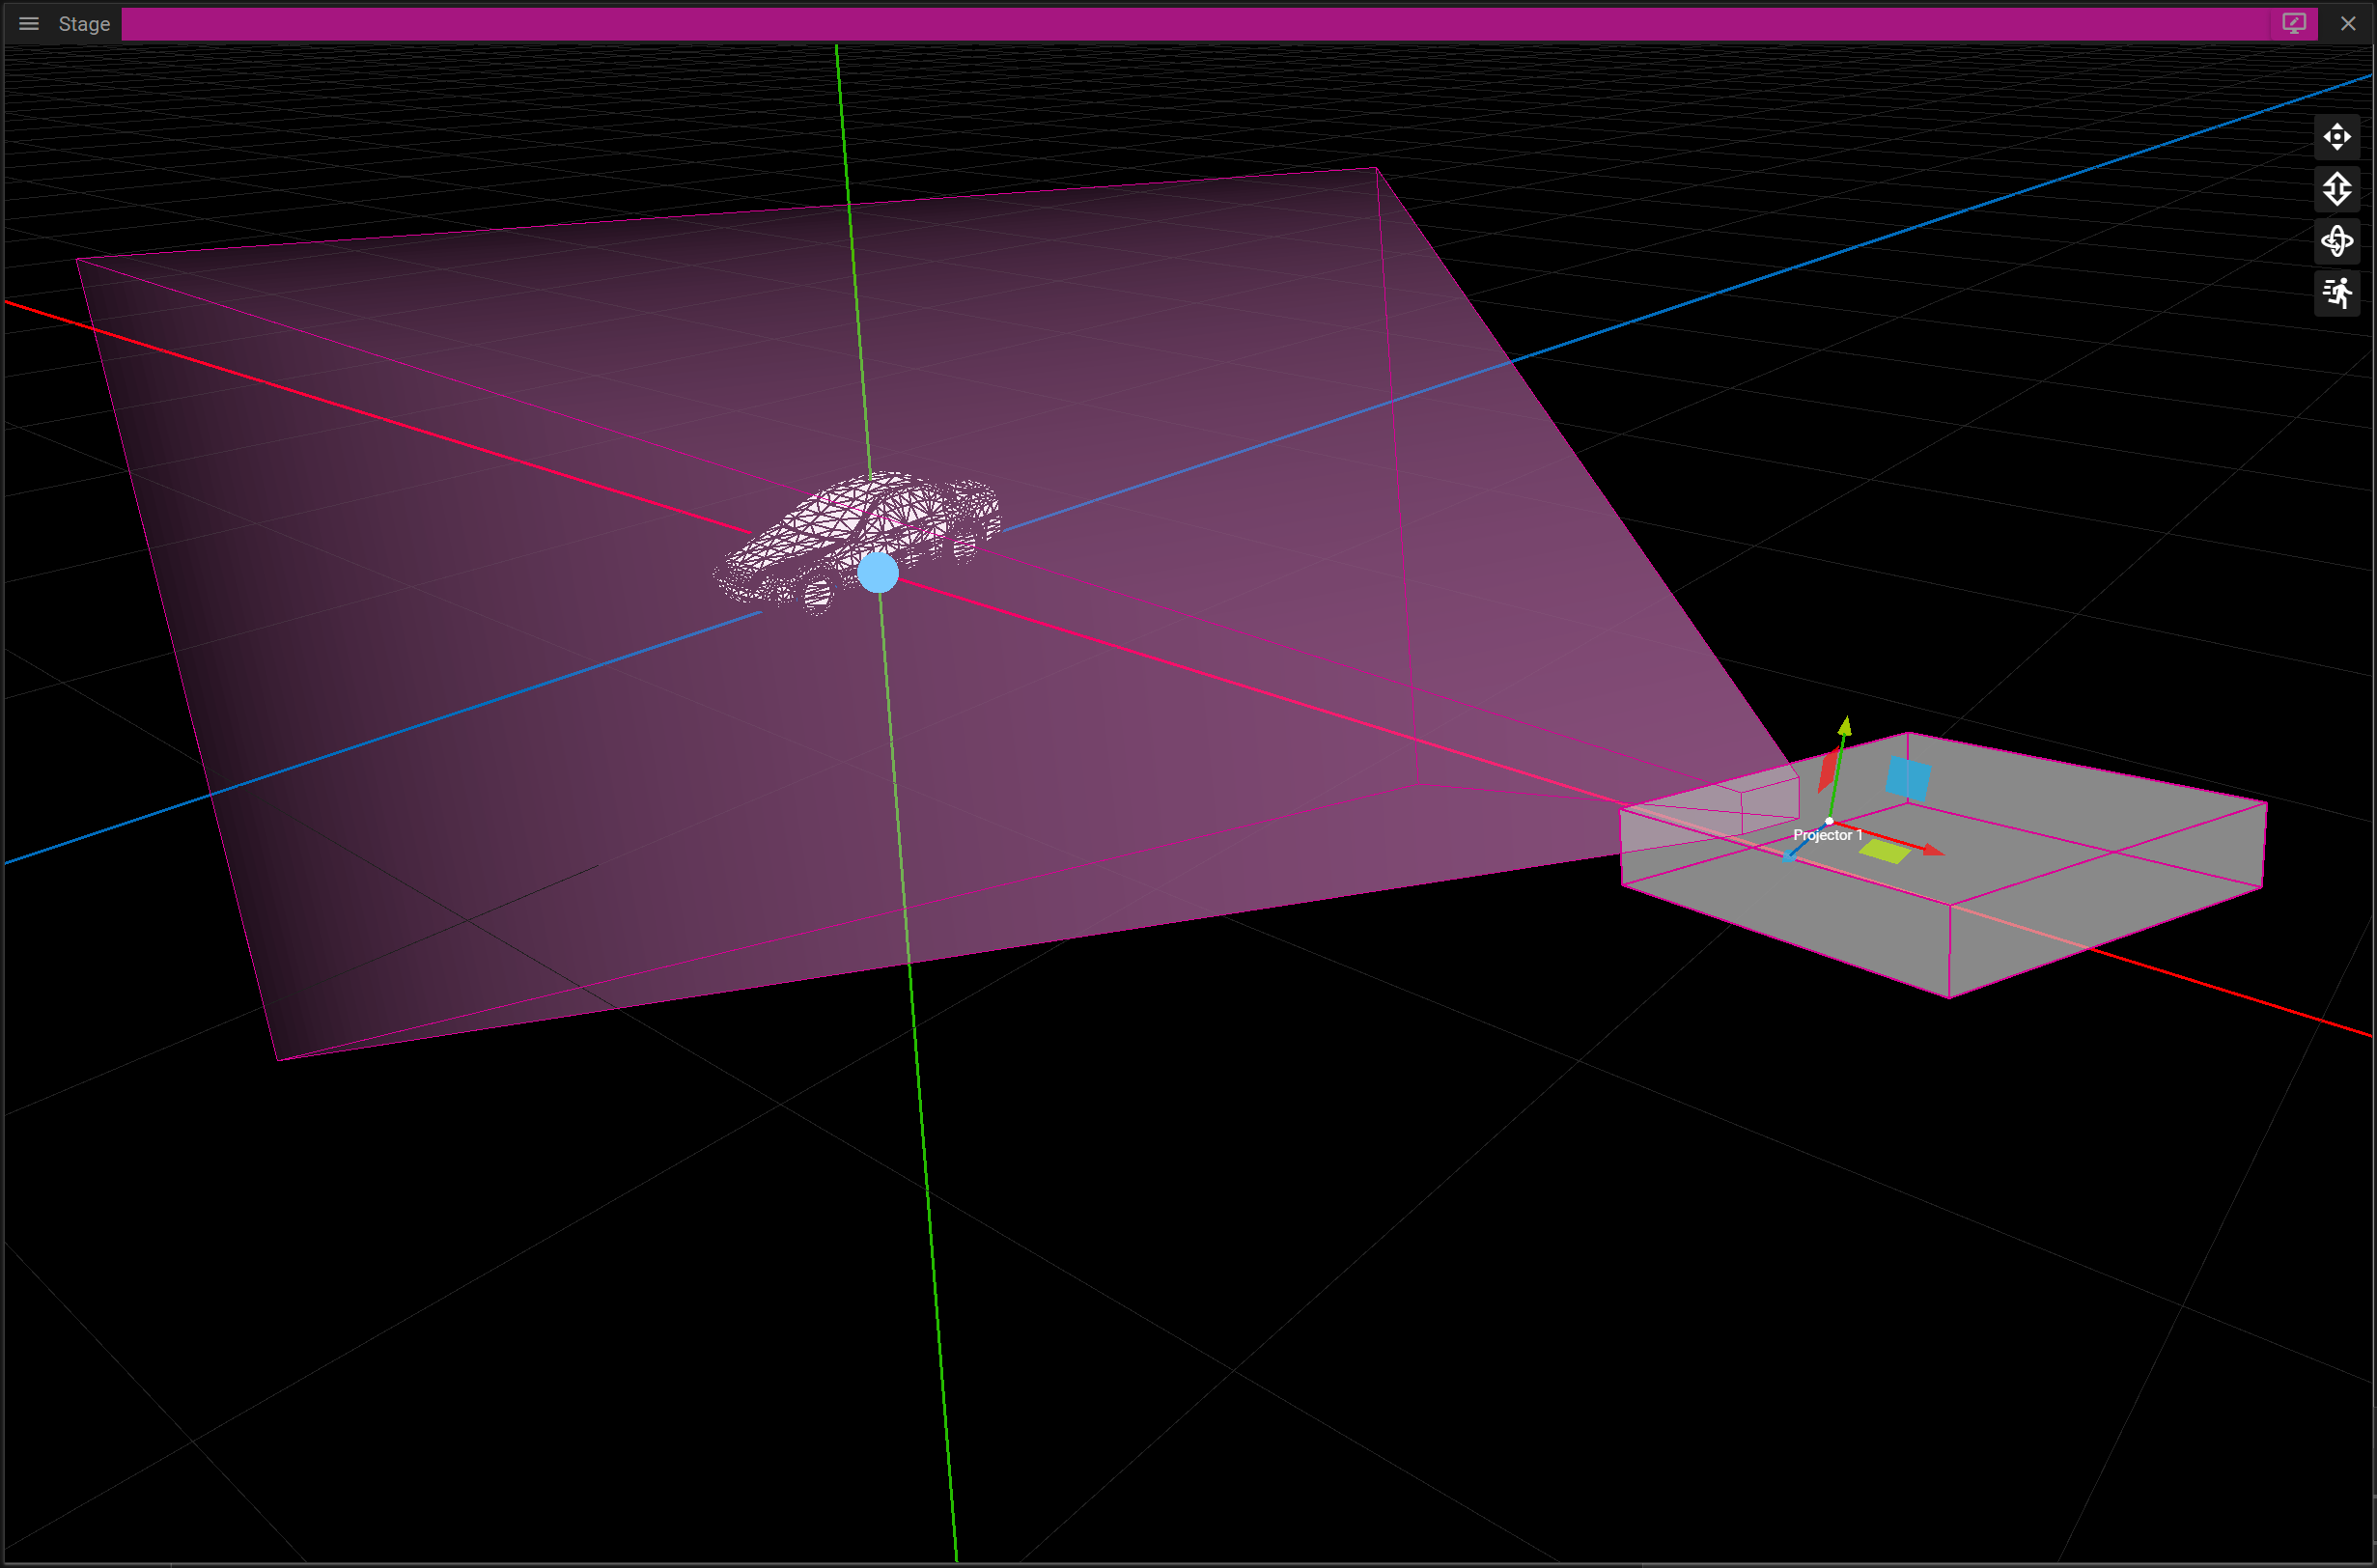
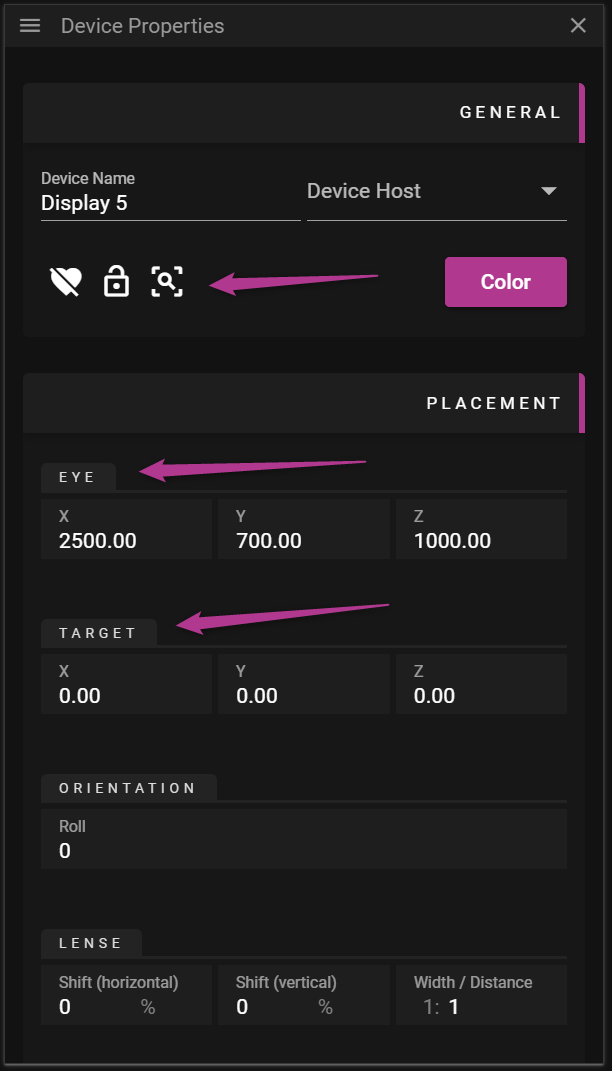
Next you can either change the Target and Eye for the projector in the Display Properties window or you can control the projector as if it was a camera. As an alternative you can position the projector by controlling it as a First Person camera.
To do this you can either click the Frame in Stage button found in the Display Properties window or by double-clicking the projector. This camera mode is referred to as Projector mode.
CALIBRATION
Provided you have prepared your virtual scene you are now ready to calibrate the projector. The goal with the calibration is to align virtual points with points existing in the real-world. If done correctly it is possible to seamlessly project media on top of a real object. The calibration process consists of the following sub steps:
- Place virtual points on the 3D model(s).
- Move reality points so they are at the corresponding real location on the real object.
- Align the camera to minimize the distance between the virtual and reality points.
Here is an overview of the UI:

- Switch between View and Calibration mode.
- The projector may only be moved in View mode, for instance by using the W-, A-, S-, D- or arrow-keys.
- Reset the calibration.
- Edit virtual points.
- Edit reality points.
- Add points.
- Move points.
- Remove points.
- Enable/Disable vertex snapping.
- Link/Unlink the projector to the camera.
- Manual edit of calibration points.
- Update the calibration only when the calibrate button (14) is clicked.
- Continous calibration.
- When a reality point is moved the calibration is updated immediately.
- Control the movement velocity for the reality points.
- Reposition the reality points on top of the virtual points.
- Perform calibration.
- Indicates how well the calibration solution could align the virtual and the reality points.
- Exit projector mode.
VIRTUAL POINTS
There are three types of edit operations you can perform when you place virtual points on the surface of a 3D model:
- Add point.
- Move point.
- Remove point.
To add a virtual point, you need to activate the add (+) edit operation and click somewhere on the surface of the 3D model. When a point has been placed it can be moved or removed by activating the other available edit operations. To simplify placing virtual points there is a snapping option that can be enabled or disabled. When the snapping is active, adding and moving virtual points will snap to nearby vertices, basically the points that define the surface of the 3D model.
You may also unlink the projector from the camera to simplify placement of points without moving the projector. You can toggle the linked state by clicking the linked icon. When a projector is relinked to a camera the camera will move to the projector’s POV, not the other way around.
Six virtual points are required to be able to calibrate a projector successfully. More points can be added to further constrain the mapping but please note that more points does not necessarily give a better result.
REALITY POINTS
The reality points are automatically created from the virtual points. These points are not directly bound to the surface of a 3D model but since each reality point is associated with a virtual point they are indirectly bound to the surface of the 3D model.
There are two ways to edit the reality points:
- Manually.
- Continuously.
It is recommended to start by moving the points manually to give an approximation of where the points should be located. To move a calibration point you need select it by left-clicking on it (or close to it). You may also select reality points by using W-, A-, S- and D-keys or by using the left stick on a compatible gamepad. Once selected, a point can be moved by using the arrow keys or by using the right stick of a gamepad. When moving a reality point the goal is to make a virtual point on the 3D model match the corresponding reality point on the real object. For instance, if you select a virtual point located on the lower left corner of a box you want to make the corresponding reality point project on the lower left corner of the box from the real world. Once all reality points have been moved you can click Calibrate to try to align the virtual and reality points with each other.
There is a accuracy percentage label indicating of how well the system can perform this alignment of points. If the label says 100% you have perfect alignment but you can still achieve good results even with lower accuracy level.
In the manual mode it is also possible to Reposition the reality points. If you click that button you will reset reality points placed exactly over the virtual points. This may be useful if you end up in situations where the calibration gives very poor results.
During fine tuning of the calibration process, it might be helpful to activate the Continuous calibration mode. This mode will update the calibration directly when a reality point is moved. If this mode is being used when some of the reality points are far from their correct locations, you might experience severe jumps of the projector making the calibration process hard to complete. So again, only use this mode for fine tuning.
When adjusting the reality points it might be useful to hide the UI overlaying the Stage window. To do so you need to locate the button represented by an eye at the top of the Stage window. Click it to toggle the UI on/off.
