CHANNEL MAPPING
In the first step of channel mapping, the individual channels of an audio cue are routed to audio buses, this is done in the Cue Properties window. By default, there are two buses, named Left, and Right, and the left and right channels of an audio cue are routed to those buses.
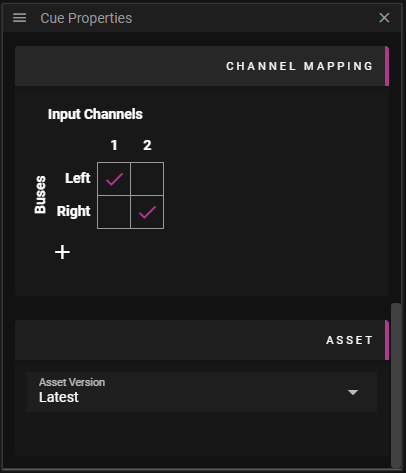
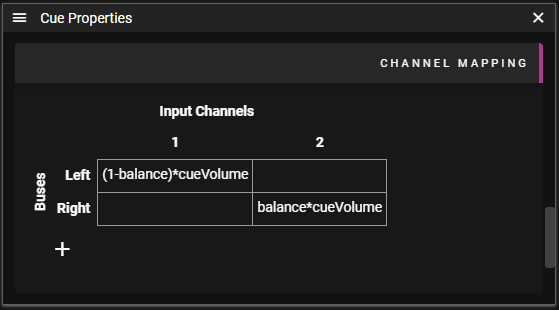
A single click in the channel mapping matrix switches the item from selected to unselected. Double clicking gives the user the opportunity to actually edit the value of the item. By default a selected item means the value is cueVolume, which always has the value of the volume tween for the cue.
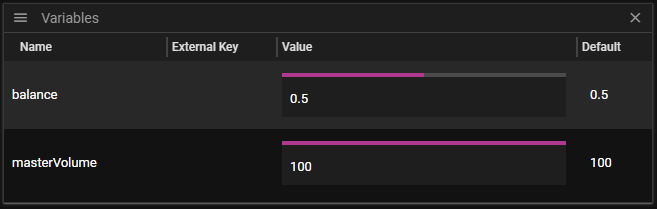
The second step of the channel mapping takes place in the Device Properties window. Here is where the mapping of buses to audio device channels are performed. Note that the default value for a checked box in this view is masterVolume, which is a varable that is always present. The user can of course add other variables to use instead of masterVolume, for instance adding a variable monitorVolume and using that in the channel mapping for the audio device carrying monitor audio (e.g. headphones of the operator). Please note that the expression in the channelmapping for audio device shall evaluate to a value between 0 and 100, as opposed to the expression of the cue channel mapping that shall evaluate to a value between 0 and 1.
IMPLEMENTING BALANCE
To implement a traditional balance control for a cue, it is possible to introduce a balance variable, and set the channelmapping for the cue according to the images below.
Below is an example of channel mapping for balance control of a cue: