SYNCHRONIZATION
TABLE OF CONTENT
IMPORTANT: Hardware synchronization functions will only work if the system is set up in the correct sequence, as below.
- EDID emulation needs to be handled first.
- Mosaic grid should follow.
- Hardware sync is the last one to be enabled.
HARDWARE SYNC
Follow the steps below to set up hardware synchronization in the WATCHPAX Config user interface.
- Under the GPU tab, use the SETUP SYNC option to configure the hardware sync settings.
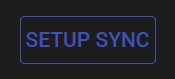
A new menu window will appear, allowing you make the desired changes to the settings.
-
Under Select Timing Source Display, select the display that will serve as the timing source.
-
Check the boxes on all remaining displays as clients.
-
Click Apply sync and wait for a confirmation message.

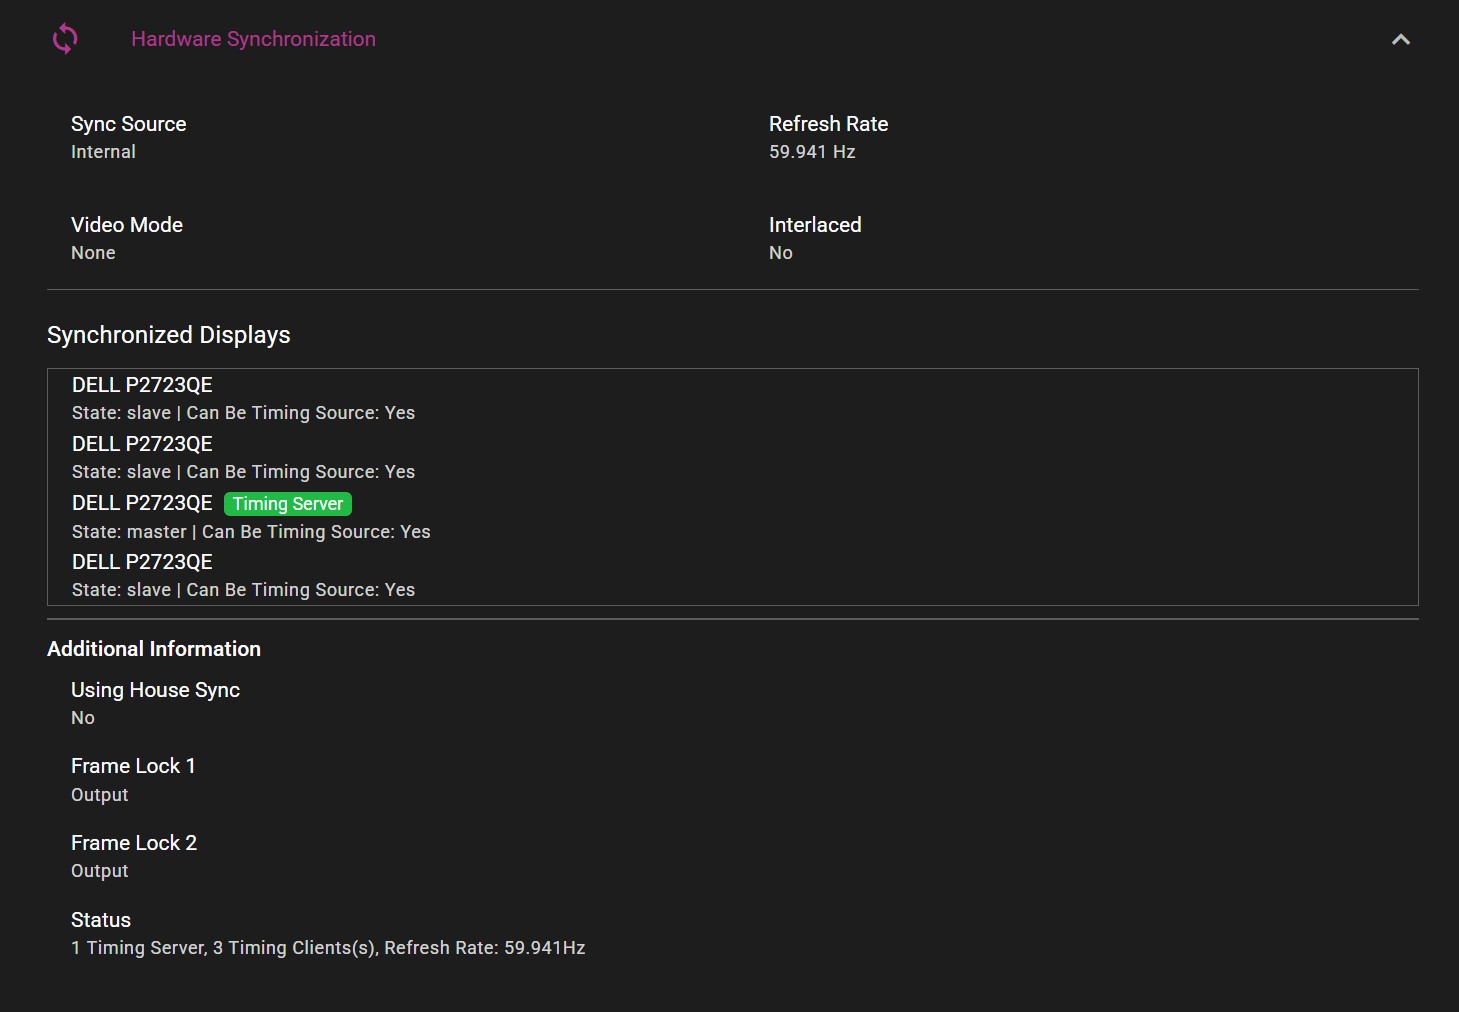
Current sync configuration can be viewed in the Hardware Synchronization section under the GPU tab:
HOUSE SYNC
In the Configure Hardware Sync window there is also an option to enable House Sync, which allows the server to receive a synchronization signal from an outside source, through the BNC connector on the sync card.
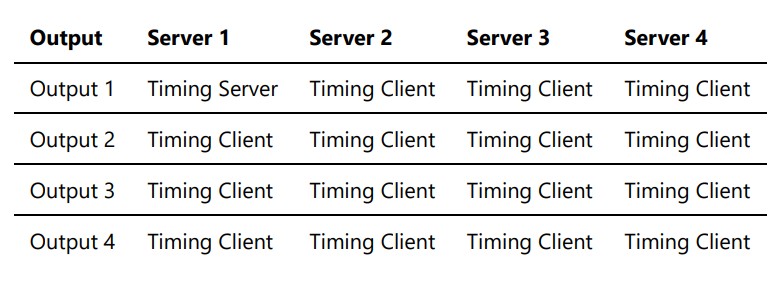
SYNCHRONIZATION USING MULTIPLE SERVERS
The following section has information about setting up hardware synchronization between several WATCHPAX servers with built-in sync cards.
Before configuring the sync settings, make sure the servers are correctly connected together.
- Use CAT6 or better ethernet cables.
- Status LEDs on Quadro Sync cards should be active (either orange or green color).
- Cable length should be short and of high signal integrity.
- Do not make signal loops. This is a linear chain.
- It is possible to use either of the two ethernet ports on the card when connecting the units with a cable.
The sync signal should be structured in the following manner, with the signal source in the middle of the cluster:
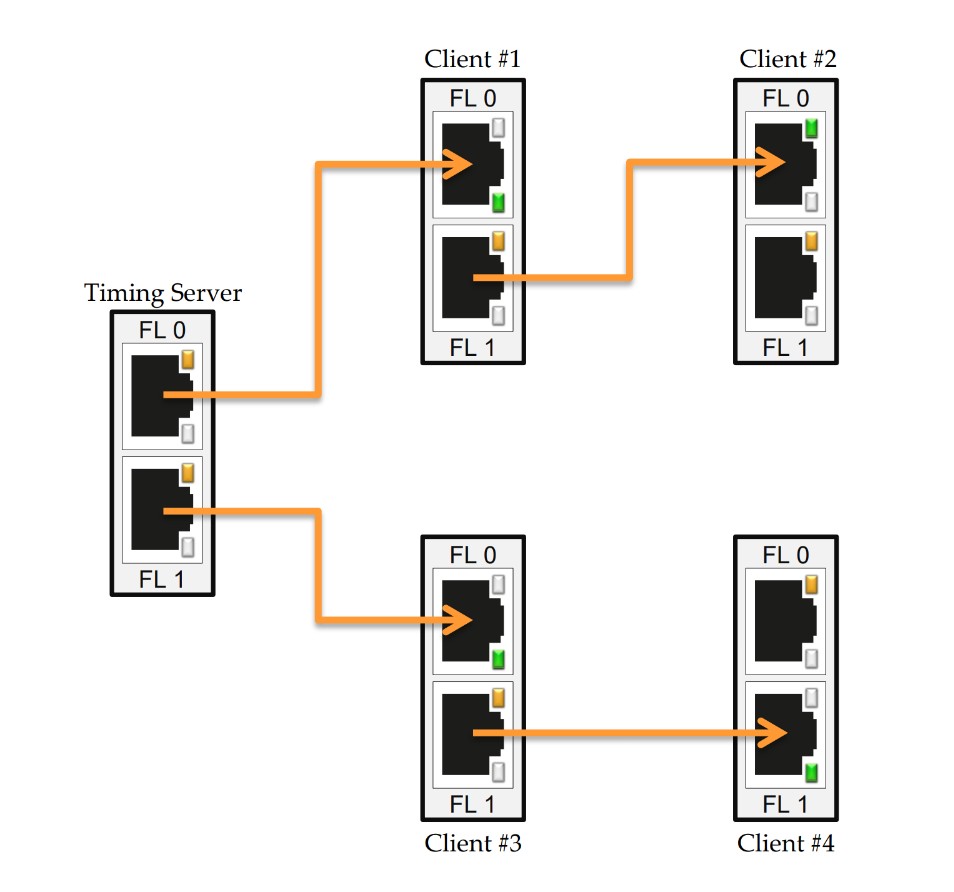
This way, the distance that the signal needs to travel is cut down, which provides a more stable signal.
- Use the SETUP SYNC option to create the hardware sync settings.
NOTE: In the case of using hardware sync across multiple WATCHPAX servers, set up the machine that includes the timing server first. Only one output on one server can become the timing source, all other outputs should be set up as clients.
-
On the server that will serve as the signal source, select the timing source display. Skip this step on the rest of the servers.
-
Select all remaining displays as clients.
-
Click Apply sync and wait for a confirmation message.
Typical setup for four servers with four displays each: