Reset WATCHPAX 50
There are occasions when you may want to reset a WATCHPAX 50, for example, if the unit has been corrupted, or if it is a rental unit and user-specific info has to be removed between rentals.
There are two levels of reset:
- Reset and keep user data. This resets the operating system, display, GPU and capture settings but retains user data, such as shows and media.
- Reset to factory settings. This takes the unit all the way back to the original factory settings and you lose all user data.
A reset, regardless of level, is an advanced measure. Make sure you are fully aware of what data you lose when you reset!
Reset and Keep User Data
This option resets the system partitions but keeps all user data. The table below shows what is retained and what is reset.
| Setting | Kept |
|---|---|
| Shows | ✓ |
| Media | ✓ |
| WATCHOUT settings | ✓ |
| Startup script | ✓ |
| Network settings | ✓ |
| Timecode settings | ✓ |
| Display settings | ✗ |
| Display mode | ✗ |
Reset to Factory Settings
This resets all partitions to factory settings and all user data will be lost. This level of reset is suitable when you want to remove all settings between projects.
Reset Procedure
The reset menu is hidden by design in order to avoid accidental resets or misuse. To reset your WATCHPAX 50 device, follow the steps below.
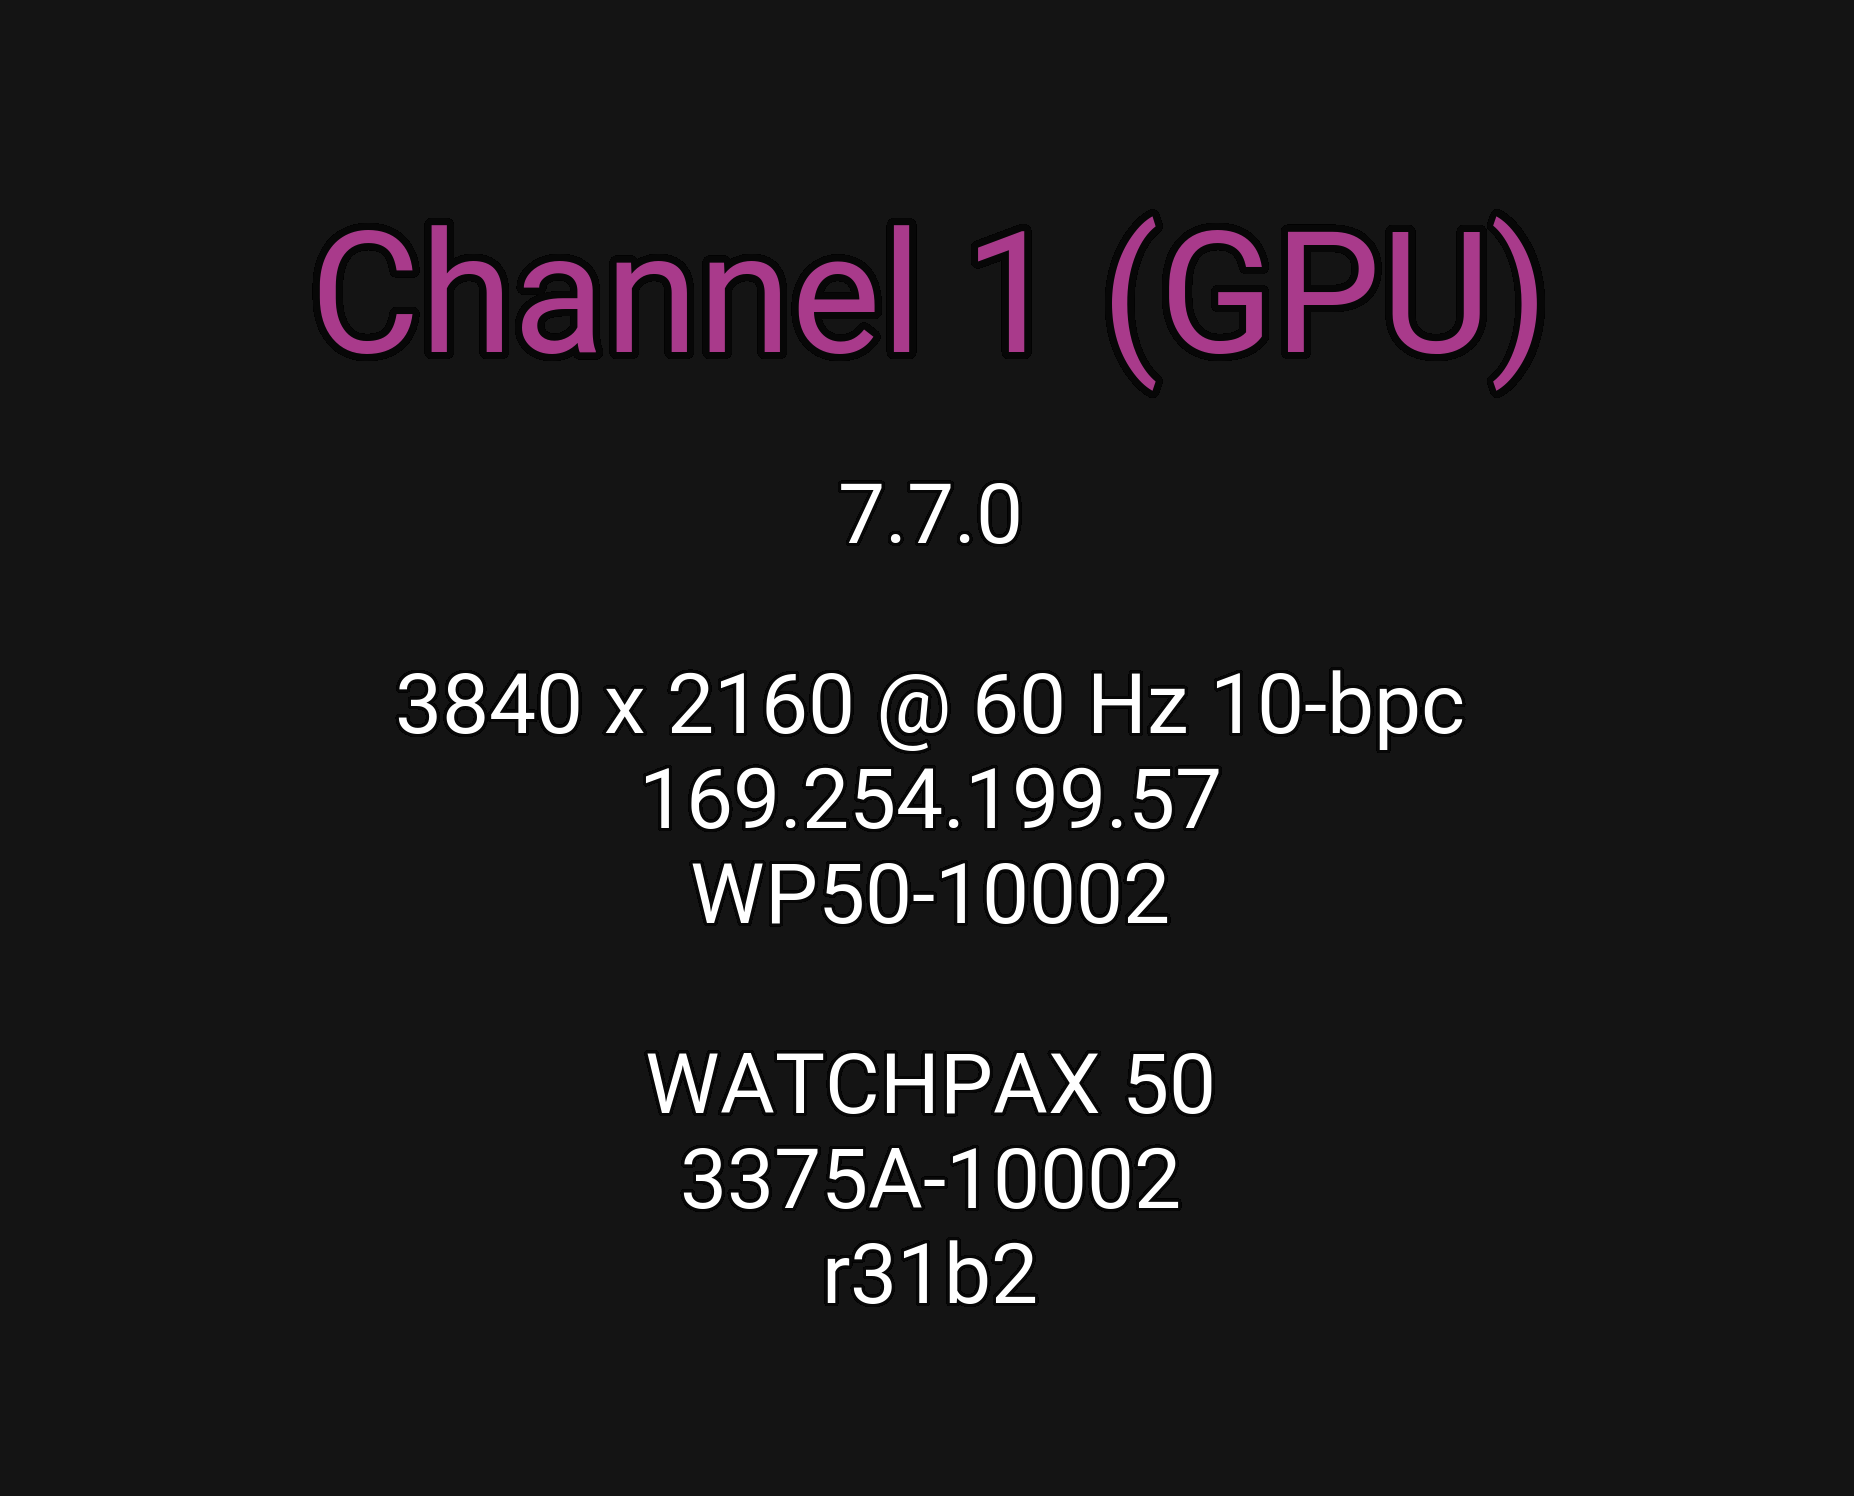
As shown below, a five-second countdown appears in the top-left corner of the display. Press the Esc key on the keyboard before the countdown reaches zero to enter the reset menu.

If you don't see a counter, it means the display device is slow to lock to the output signal. In that case, press Esc repeatedly right after power-on. The key presses will be registered even if the display has not yet shown the countdown, and the reset menu will appear once the display locks.
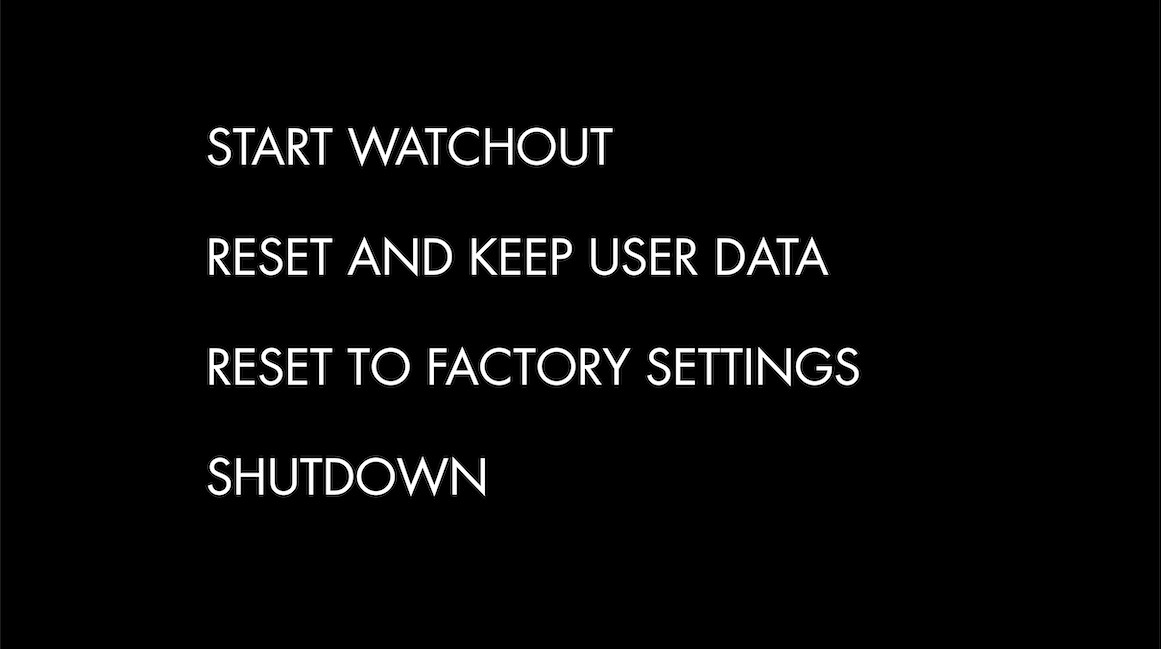
Once you have entered the reset menu, you will see the available reset options listed on screen. Use the arrow keys on the keyboard to highlight the desired option, then press Enter to confirm:
- Reset and keep user data -- resets system settings but retains your shows, media, and WATCHOUT configuration.
- Reset to factory settings -- erases everything and restores the unit to its original factory state.
There will be no confirmation prompt -- the reset process starts immediately after you press Enter! Double-check that you have selected the correct option before confirming.
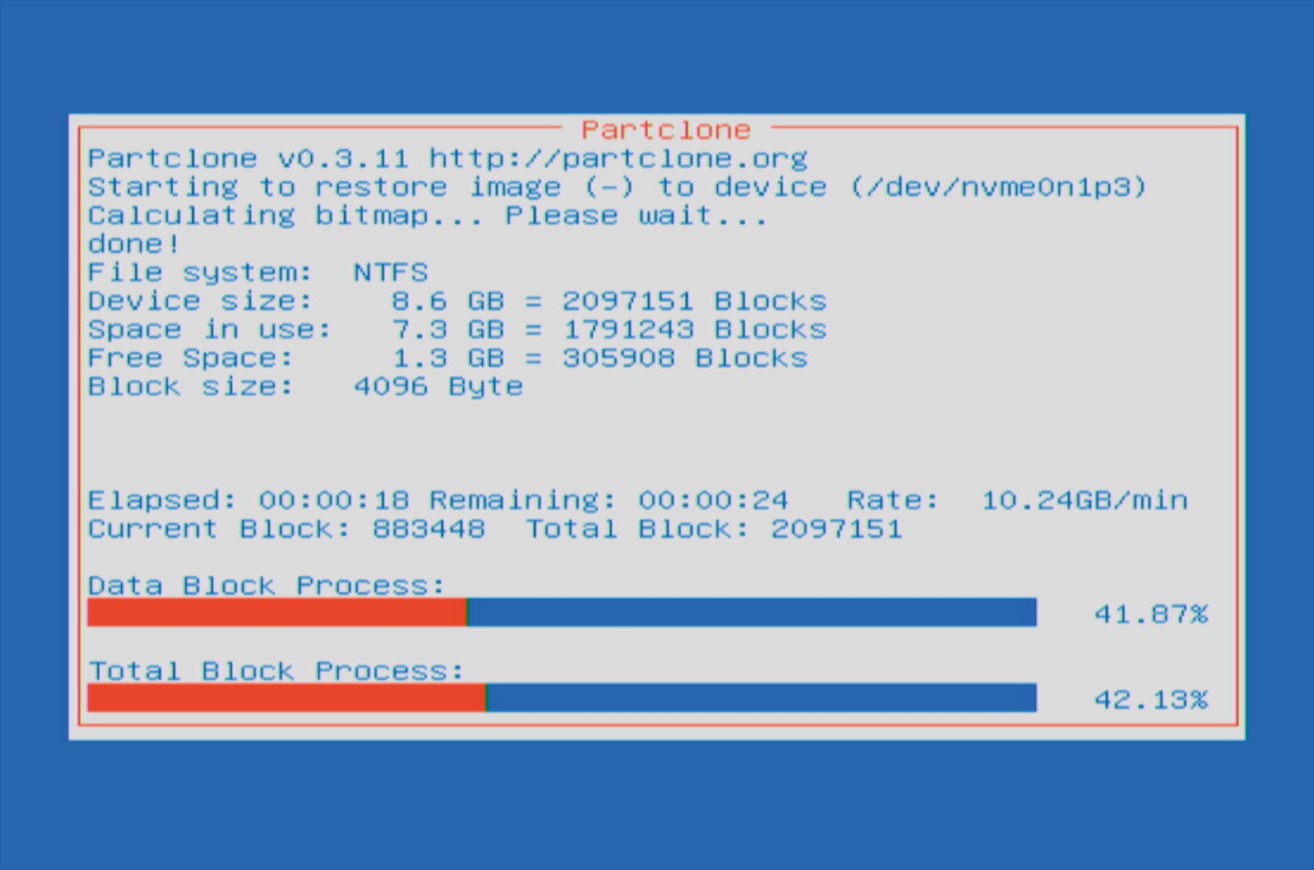
The reset process begins immediately after your selection, and progress indicators will be shown on the connected display. Depending on the reset level you chose, this process may take several minutes as the system partitions are rewritten. Do not press any keys, disconnect the power cable, or unplug the display while the reset is in progress.
After the initial reset completes, the WATCHPAX 50 will automatically restart several times in order to reconfigure the operating system and hardware settings. This is normal behavior -- each restart configures a different component of the system. The number of restarts may vary, but typically the unit will restart two to three times.
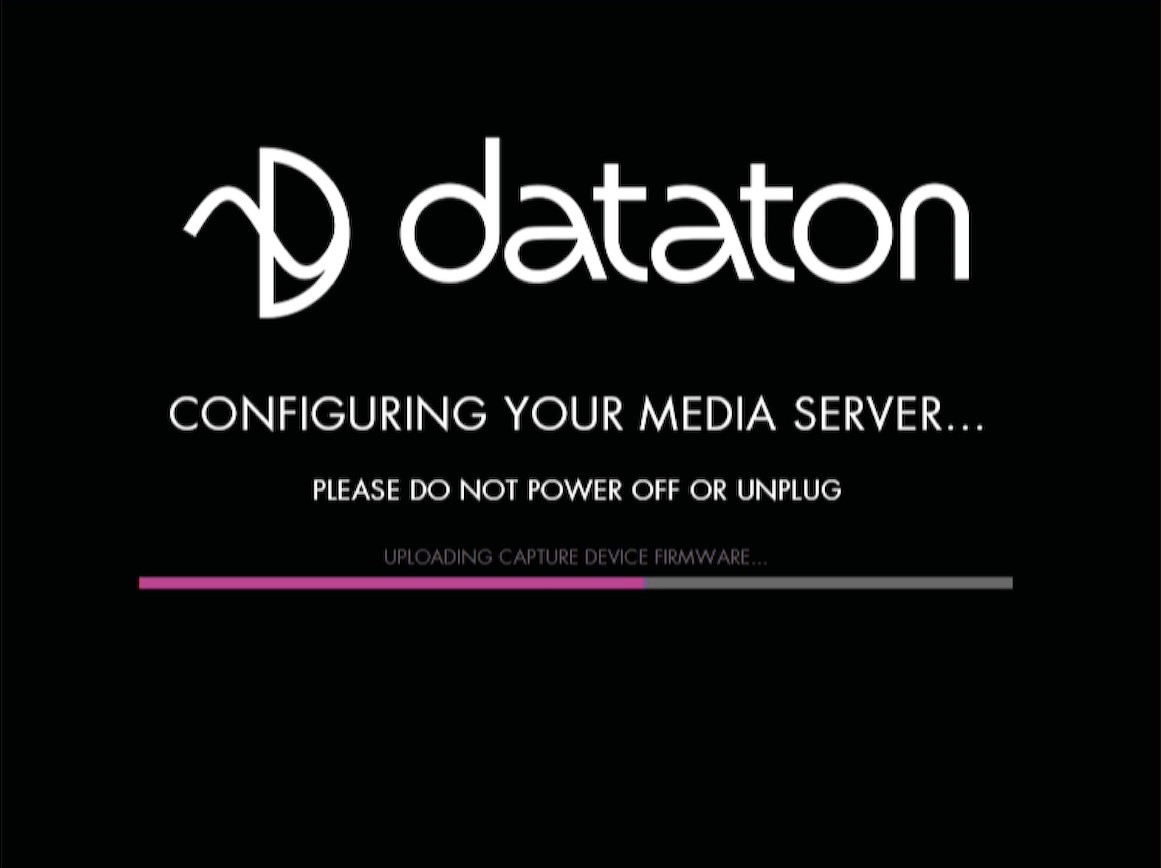
Do not power off the unit during the configuration process! Interrupting the reconfiguration can leave the system in an incomplete state and may require you to repeat the entire reset procedure.
WATCHOUT will start automatically when the entire reset and reconfiguration process is complete. You will see the standard WATCHOUT display output with the system image version number shown after the serial number -- this confirms the reset was successful. You can now disconnect the keyboard, reconnect your USB devices, and resume normal operation.